OpenStack IPv6 Example
This guide provides an example of how to set up an environment that provides Virtual Machines with IPv4 and IPv6 connectivity.
Minimal Example
To simplify this example, we only describe the mandatory steps and options. The OpenStack network component configuration is described in Networking
IPv6 support
You have the possibility to allocate IPv6 Global Unicast Addresses for your virtual subnets. IPv6 is supported in the Dual-Stack mode, which means that a single virtual network may have both IPv4 and IPv6 subnets. Ports of virtual machines connected to such network, will get both IPv4 and IPv6 addresses. IPv6-only networks are currently not fully supported, due to limitations in the Metadata service. While you may still run such setups, your virtual machines will not be able to retrieve public SSH keys or use other features that the Metadata service provides.
There is no possibility to use Floating IPs in the IPv6 address family, which means that you cannot allocate a Floating IP from the IPv6 address pool, neither you can have a Floating IP pointing at an IPv6 address.
globally-routable
Please note that any virtual machine or load balancer with an IPv6 address in a globally routable subnet is immediately reachable from the Internet, please plan your security groups accordingly.
Prerequisites
- An OpenStack project
Router
We need a router to connect external (for example internet) and internal networks.
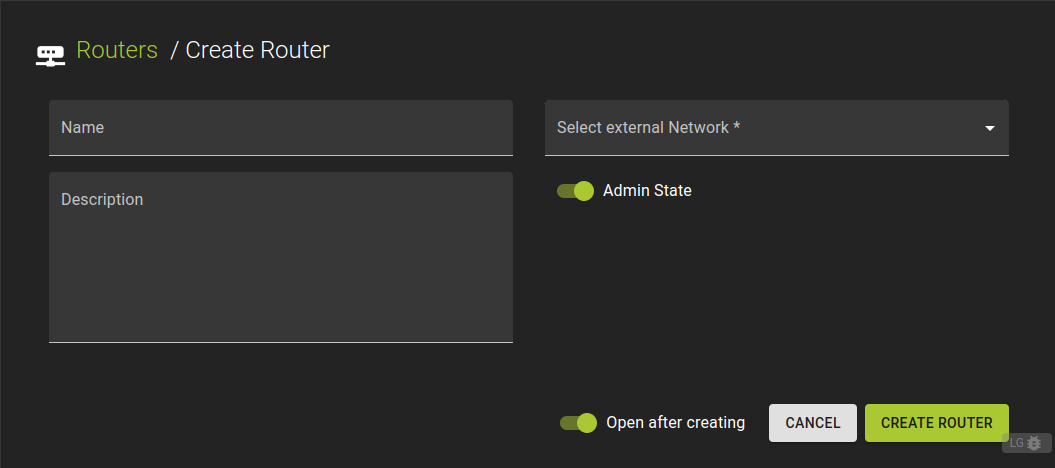 To create a router:
- On the routers list, click Create
- Assign a name and a description.
- Choose the external network that the router will connect to. for example "ext-net"
- Confirm the creation by clicking Create Router
Network and Subnets
We need to create a virtual network which contains our IPv4 and IPv6 subnets.
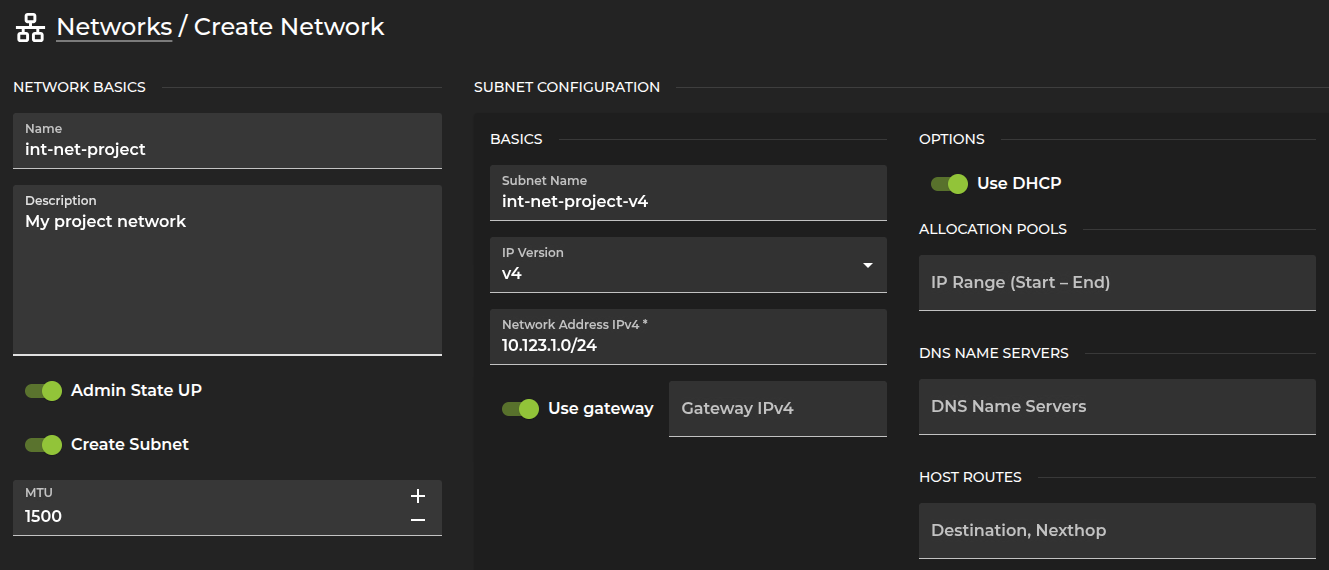 To create a network:
- On the networks list, click Create
- Name and describe your network.
-
Configure Subnet:
- Assign a
nameto the subnet. IP version: Choose IPv4.Network Address: Set the address range for the subnet.
- Assign a
-
Confirm by clicking Create Network
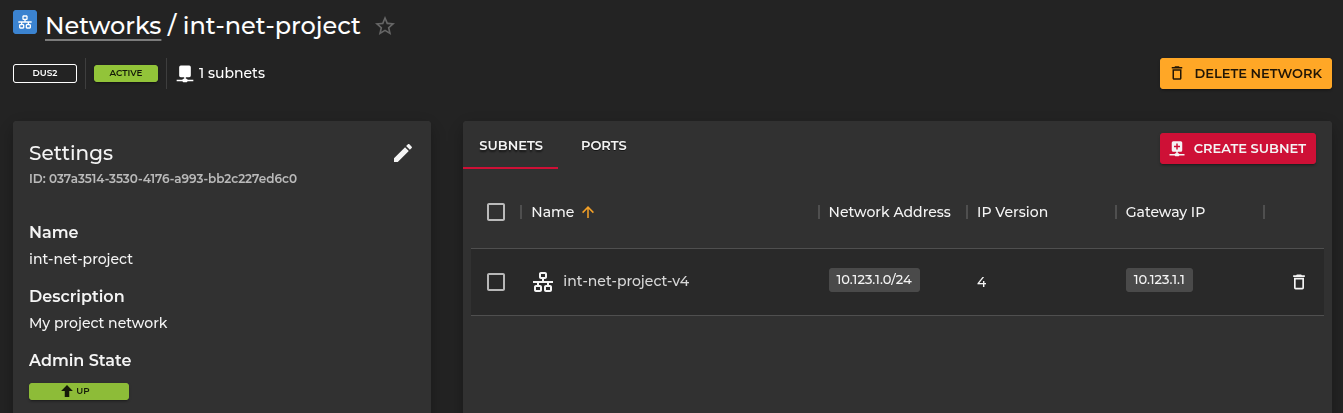
-
The UI will now show this network and subnet.
-
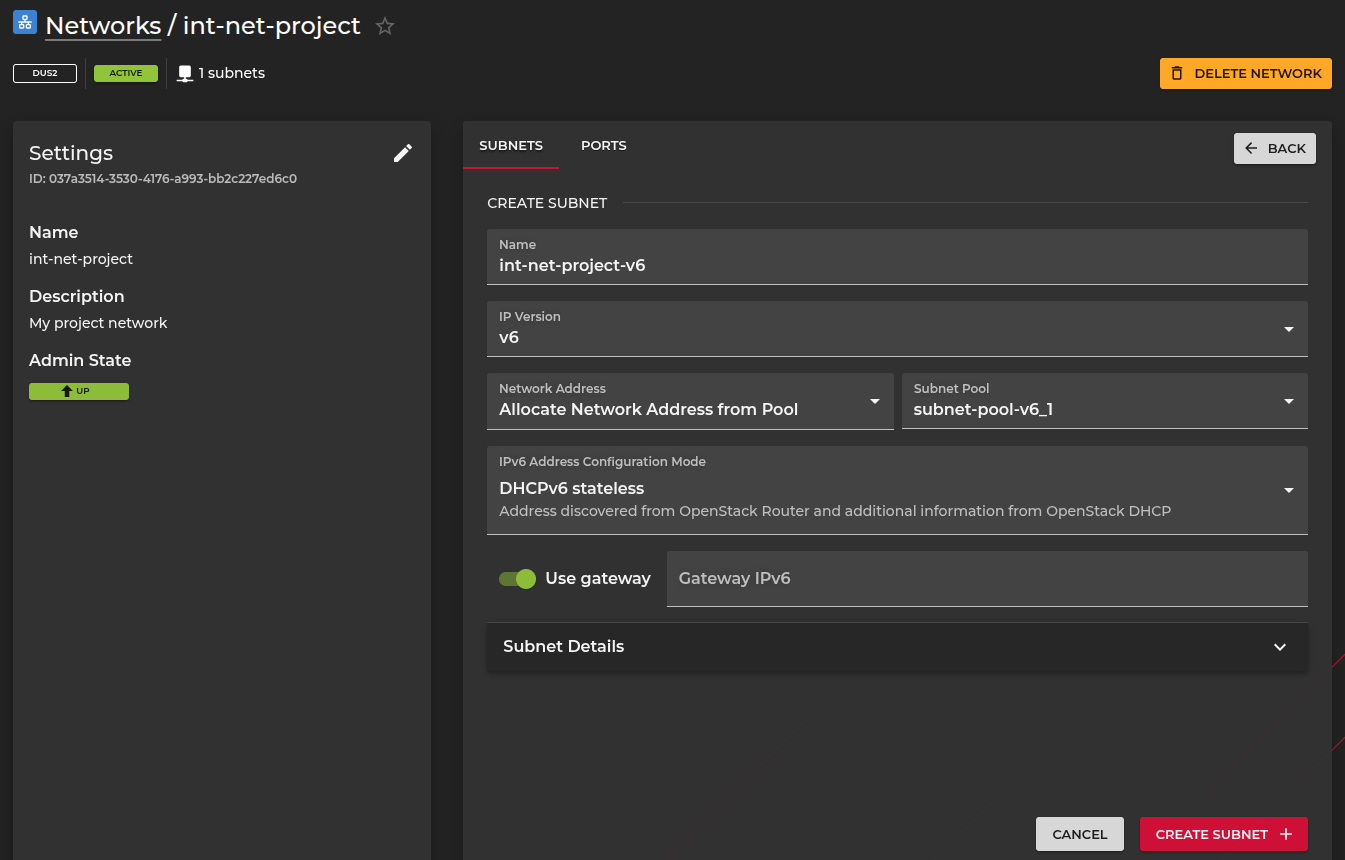
Click on Create SUBNET to add the IPv6 subnet.
-
Configure Subnet:
- Assign a
nameto the subnet. IP version: ChooseIPv6.Network Address: ChooseAllocate Network Address from PoolSubnet Pool: Choosesubnet-pool-v6_1IPv6 Address Configuration Mode: ChooseDHCPv6 stateless
- Assign a
-
Confirm by clicking Create Subnet
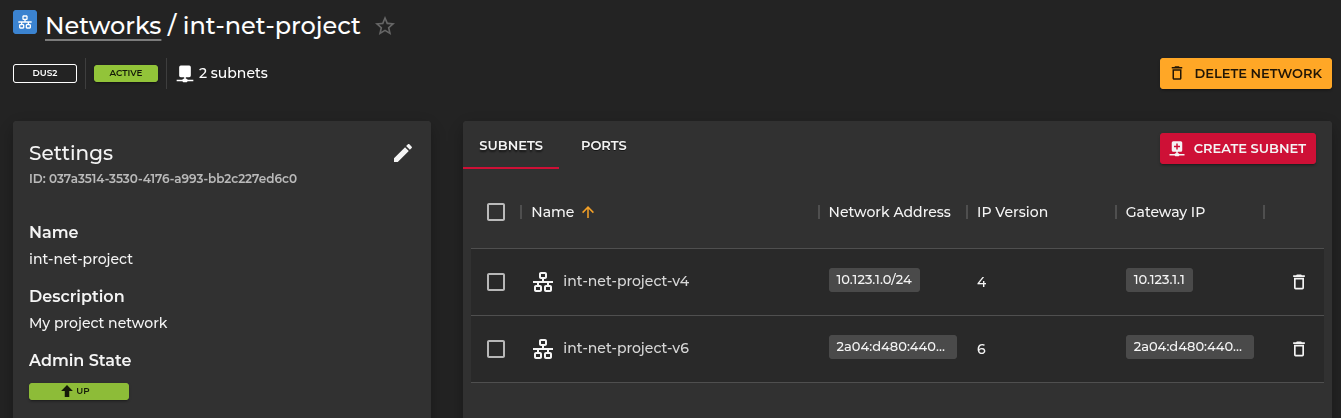
- The UI will now show this network and both subnets (IPv4 and IPv6).
Router Interfaces
We need to connect our router to our network.
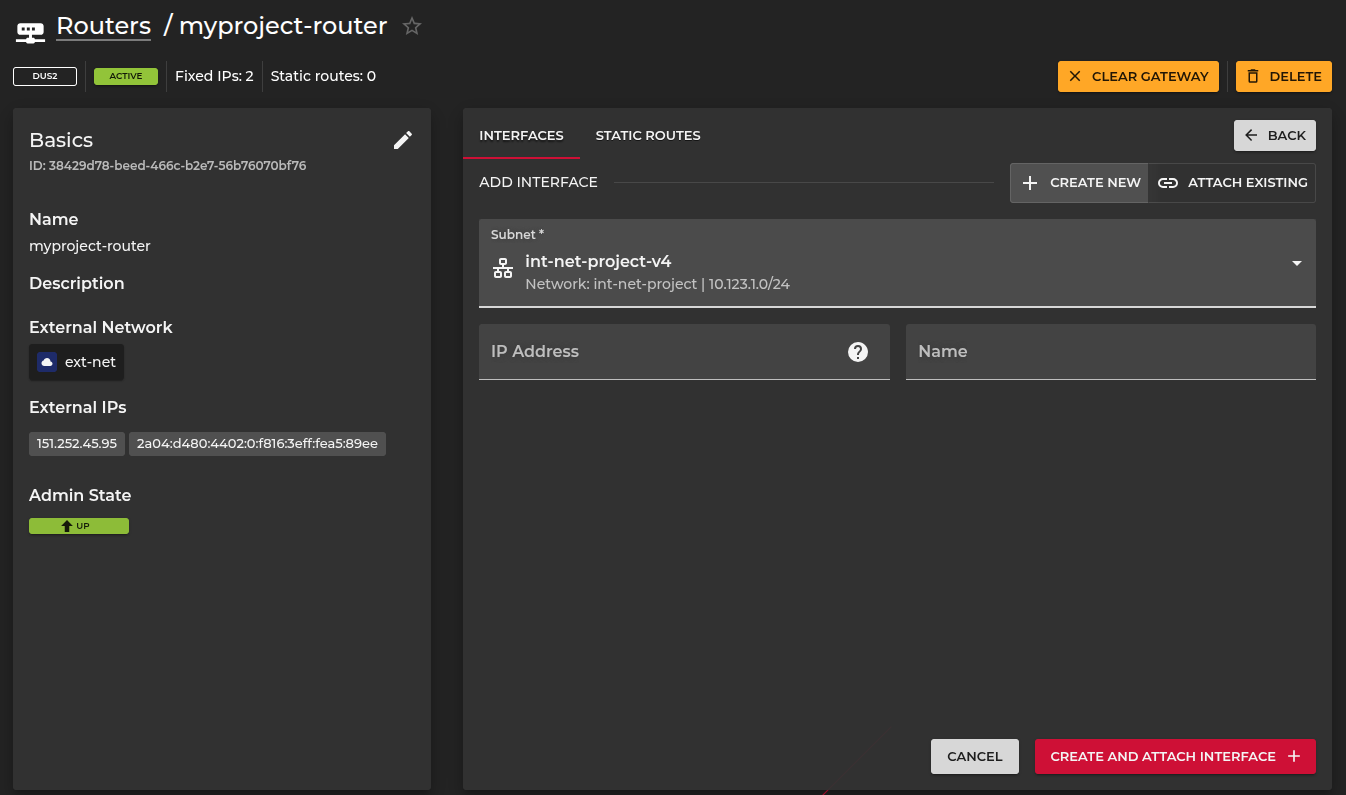
To add router interfaces:
-
Open
Routersand select your router. -
Click on ADD INTERFACE to add interfaces.
-
Configure the Interface:
Subnet: Assign oneSubnetfrom the network we created in the previous section.
-
Confirm by clicking CREATE AND ATTACH INTERFACE
-
Repeat Steps 2-4 to add your second subnet.
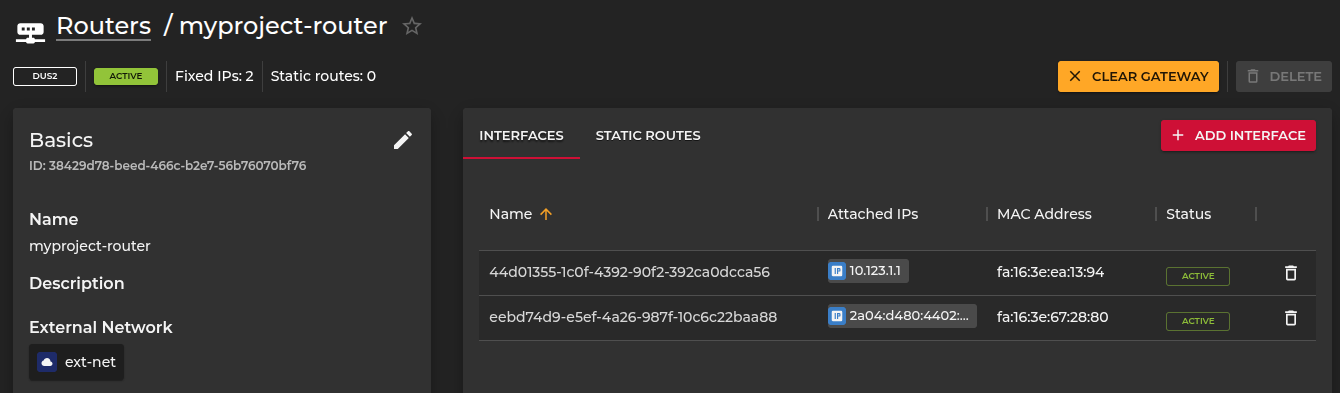
- The UI will now show two interfaces of the router which are connected to your network.
Security Group
As VMs do not allow incoming connections by default, we need to configure a security group to allow incoming network connections.
Allowing incoming connections is optional
This step is only required if incoming external network connections are needed, e.g., SSH or HTTPS access to the VM.
Perform this configuration with caution, as this will expose services of the virtual machine to the configured remote networks.
To add security groups (Optional):
-
Open
Security Groupsand click on CREATE -
Set a
NameandDescriptionfor this security group. -
Confirm by clicking CREATE SECURITY GROUP
-
Click on ADD RULE to add additional rules.
-
Define a rule to manage network traffic to and from your instances by:
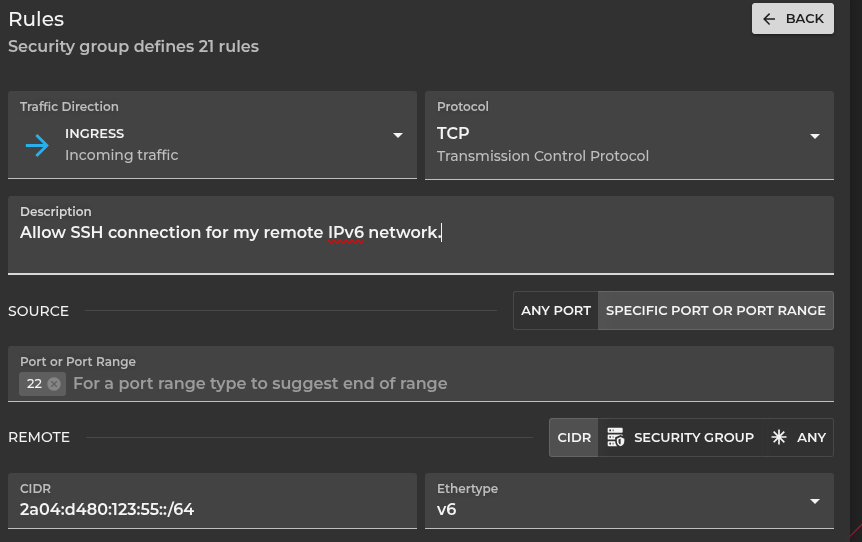
Traffic Direction: Choose whether the rules apply to incoming (ingress) or outgoing (egress) traffic.Protocol: Define the network protocol that the rule will target.Description: Add an optional description.Source: Specify to which port or port range this rule applies.Any Port: Use to apply the rule to any port.Specific: Target a specific port by its protocol name or code.Range: Define a range of protocol codes, where the end code is higher than the start code.
Remote: Specify the remote IP address or remote security group for the rule.CIDR: CIDR specifies the remote network address or network prefix.Ethertype: For IPv6 network prefixes, selectv6.
- Confirm by clicking Create Rule .
Virtual Machine
You can now create and connect Virtual Machines to this network.
Create server
When creating a new Server, the network can be attached in the connectivity configuration section.
The IPv6 address offered to the Virtual Machine will be displayed in the server list.
Further information can be found in Server
Operating System
Please consider that the Virtual Machine Operating System must be configured to support IPv6 and perform the network configuration.
The example provided above performs automatic network configuration which is sufficient for the Ubuntu Images available by default.
For further details on the Operating System configuration, check the vendor documentation.
globally-routable
Please note that VMs connected to this network may receive a globally routable IPv6 network address by default.