Getting Started
The following section describes a production-ready PostgresDB deployment.
Prerequisites
To test the provisioned database, the postgres CLI is adequate.
You can skip this step if you already have an IDE or another GUI-based database tool.
The simplest way to connect to a postgres database is to install the following postgres client.
For other distributions, use the appropriate package manager.
The most convenient way on MacOS is to use the Homebrew package manager. The following command installs the Postgres client package (libpq):
If Homebrew doesn't suggest how to add the installed client to your PATH, run:
The client is available in any new shell.
The easiest way is to download the installer from the Windows installer page.
Create a Postgres DB deployment
For demonstration purposes, the following section describes a simple single PostgresDB deployment:
Info
The provisioning process may take a couple of minutes.
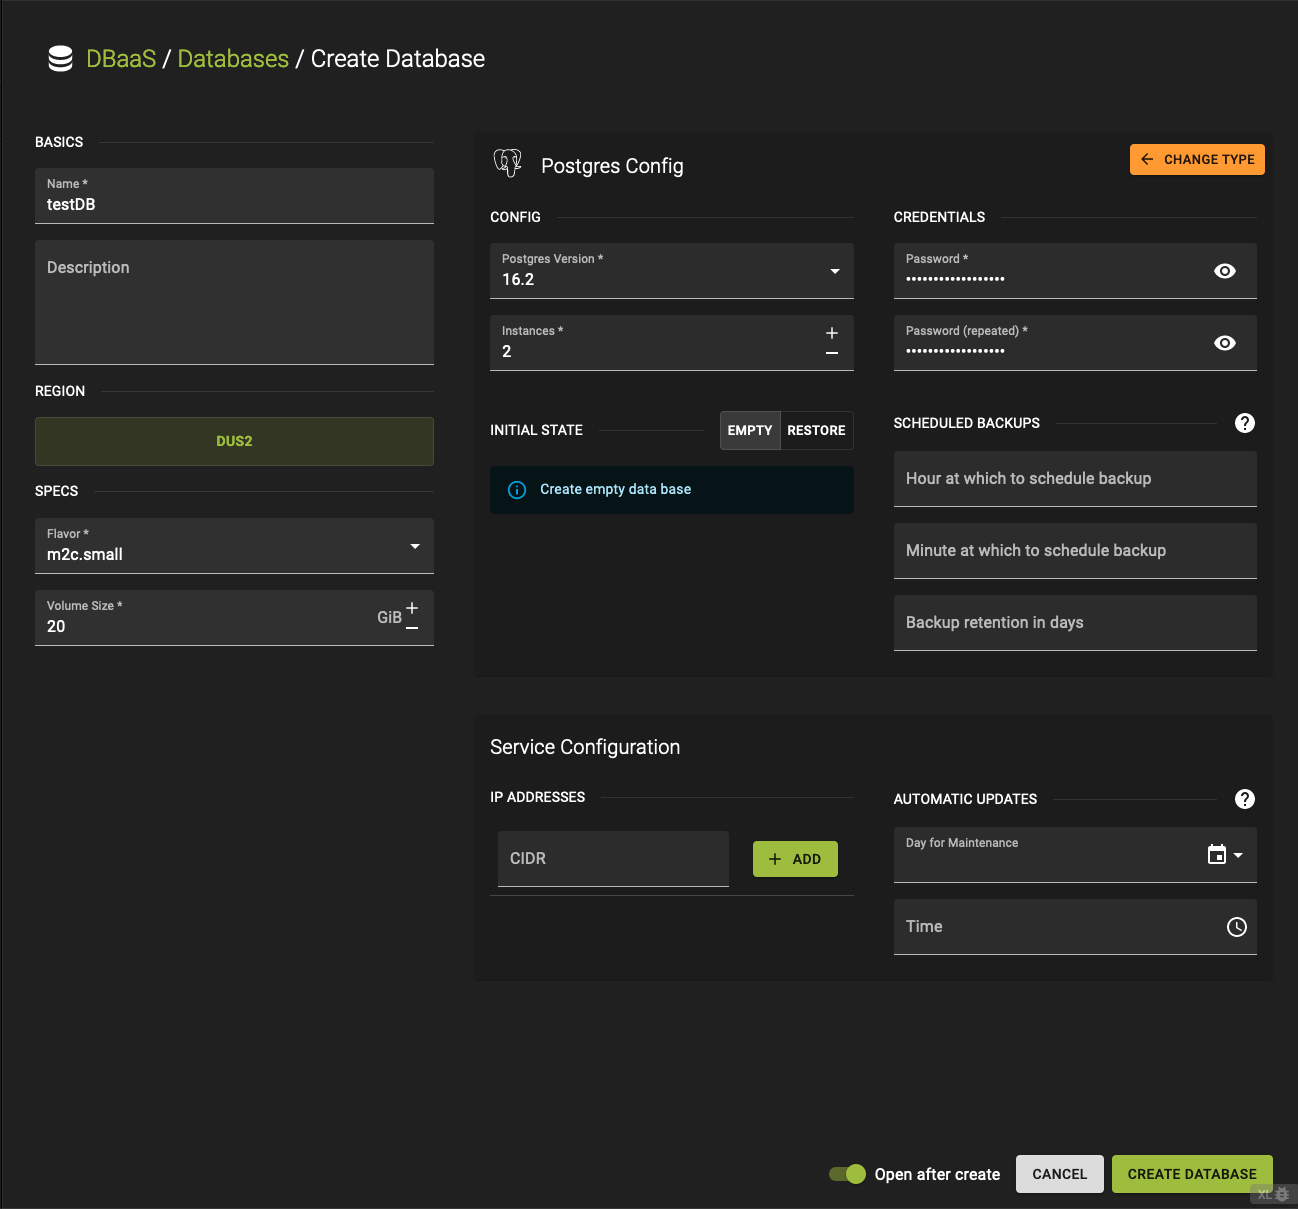
This example PostgresDB has a default daily scheduled backup. A scheduled backup sets the time and the retention period, but not the interval. All backups run on a daily basis.
Coming soon.
Test the new Database
To test the connectivity, most GUI-based SQL clients include a test connection feature once you set up a new database connection. This guide uses the postgres command-line client.
When the database status changes to Active, its hostname becomes visible on the following screen:
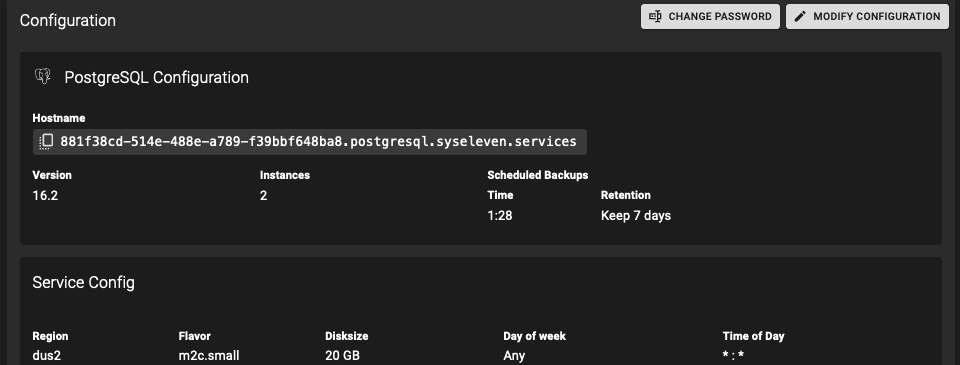
In this example, use the database hostname 881f38cd-514e-488e-a789-f39bbf648ba8.postgresql.syseleven.services with the psql command below.
psql -h 881f38cd-514e-488e-a789-f39bbf648ba8.postgresql.syseleven.services -d admin -p 5432 -U admin

Password for user admin:
output:

SSL connection (protocol: TLSv1.3, cipher: TLS_AES_256_GCM_SHA384, bits: 256, compression: off)
Type "help" for help.

admin =>
Scheduled Backups
DBaaS includes automated backup processes to protect your databases. The system schedules backups at regular intervals.
For data durability and accessibility during a regional outage, DBaaS stores backups in a location outside the region that hosts your databases.
User-Initiated Backups
Users can use pg_dump to create backups of specific databases, tables, or schemas.
Check the installed Postgres version
You need psql version 16 or later to follow the steps below.
The following command sequence creates a backup task: the entire database dumps to a recoverable SQL file.
First, create a test database with sample data. Create a CSV file with the following sample content (you can use any editor instead of vi):
vi testdata.csv

London,sunny,42,89
New York,cloudy,32,75
Los Angeles,rainy,12,49
Bielefeld,sunny,52,89
Insert the database hostname from the overview above:
psql -h 881f38cd-514e-488e-a789-f39bbf648ba8.postgresql.syseleven.services -p 5432 -d admin -U admin

password:<yourPassword>

admin=> create schema tutorial;

admin=> alter schema tutorial owner to admin;

admin=> create table tutorial.weather
    (
        id serial,
        city        text    not null,
        type        text    not null,
        temperature integer not null,
        humidity    integer not null,

        primary key (id)
    );
Exit the psql shell, or use the \copy command from within it.
The following command persists the test data into the newly created weather table:
psql -h 881f38cd-514e-488e-a789-f39bbf648ba8.postgresql.syseleven.services -p 5432 -d admin -U admin -c "\copy weather(city,type,temperature,humidity) from testdata.csv with (format csv,header true, delimiter ',');"
The following command dumps the new database:
Coming soon.
Coming soon.
Restore
You can restore scheduled backups to a fresh DBaaS instance. The CLI approach uses the dump from the User-Initiated Backups section. The UI approach creates a new database from an existing one. Both approaches serve different use cases.
First, connect to your database. The next two steps are strictly for demonstration purposes:
Next, drop the database and its contents:
Now execute the recovery process using the backup file in your current directory:
To create a new database from an existing one, click Create and set the initial state to RESTORE instead of EMPTY.
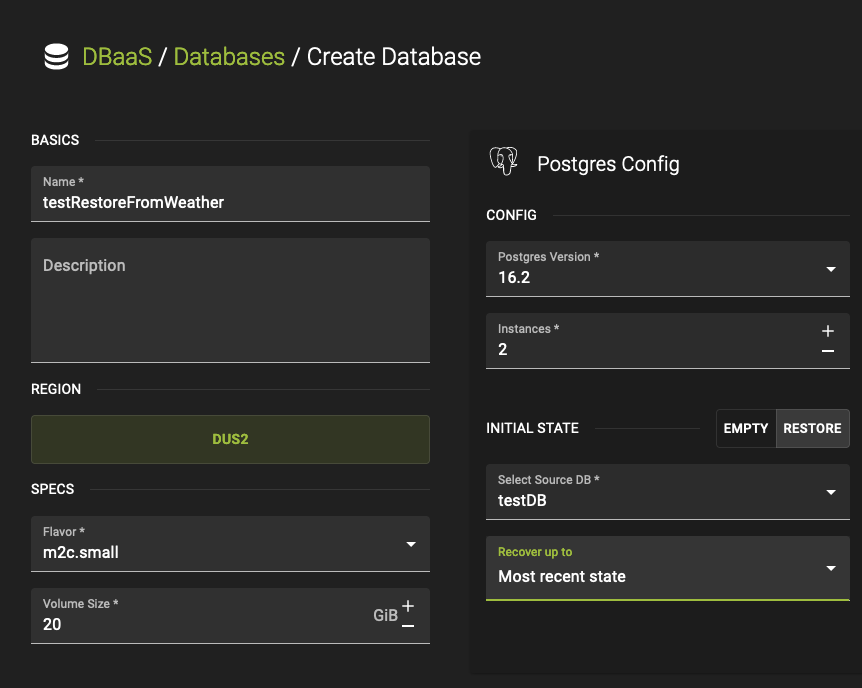
The following five recovery options are available:
- Most recent state
- Timestamp
- Name Restore Point
- LSN (Log Sequence Number)
- XID (a given transaction ID)
For this example, select Most recent state. Running select * from weather; from a psql shell shows the content from the original database.
Coming soon.
Known limitations
Changing database configuration via ALTER SYSTEM fails
ALTER SYSTEM is not supported in our PostgreSQL DBaaS because it conflicts with the configuration managed through the API.
Use the API database configuration options instead. If you need parameters that are not yet supported,
open a support ticket.