Concepts
Regions
OpenStack delivers services in distinct regions. Perform all operations within a region.
In Lists
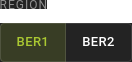 In the UI, you can toggle between regions on all list views.
On detail pages
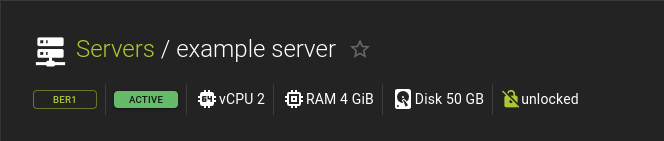 On a detail page, the region of a resource is displayed under the title alongside other vitals, like status.
The 'openrc' file specifies the default region through the OS_REGION_NAME environment variable. For your own comfort, you can create one 'openrc' file per region and adjust OS_REGION_NAME in each file.
Using the username and password (API credentials) provided by us, source the 'openrc' file to enable the CLI client to communicate with the OpenStack Cloud.
When using the OpenStack client, you can select the region by setting the OS_REGION_NAME variable accordingly. Alternatively, you can override it with the command line option --os-region-name <region name>.
Note
If you don't specify any region name in the openrc file or on the command line, the OpenStack client may pick a region in an unpredictable way, depending on what service you try to use.
Flavors
In OpenStack, flavors define the compute, memory, and storage capacity of nova compute instances. A flavor represents the available hardware configuration for a server and determines the size of a virtual server you can launch.
Resource Status
All resources in OpenStack have one or more status properties. These determine which interactions with a resource you can perform.
Most resources share one common status AVAILABLE, indicating that a resource is ready for modification and idle.
This documentation lists all possible states under the section "states" for each resource type.
The UI will display the status for resources whenever applicable.
Typically, all lists will have a column for displaying a resource's status, while the details pages of resources display the status below the title alongside other vitals.
Using the CLI, you can retrieve the status of a resource by using the respective show command.
Example:
openstack server show <server>
Example Output:
+---------------------+--------------------------------------+
| Field               | Value                                |
+---------------------+--------------------------------------+
| status              | ACTIVE                               |
| id                  | 5592f4ec-fc9e-40f4-bb4b-f1f8f35064c8 |
| name                | my-server                            |
| ...                 | ...                                  |
+---------------------+--------------------------------------+
Metadata
Most OpenStack resources provide some form of user-definable metadata. This is either in the form of tags or labels. Some resources support both.
Use tags and labels to organize your cloud resources.
Tags
Tags are single "words" that you can associate with a resource
Examples:
`staging`,
`blue`,
`spare`
Labels
Labels are key and value pairs that you can assign to a resource
Examples:
`environment: staging`,
`last-audited: 2024-08-05T10:48:58.976Z`
`custom-fk: 78ee2fef-739b3d175cd4`
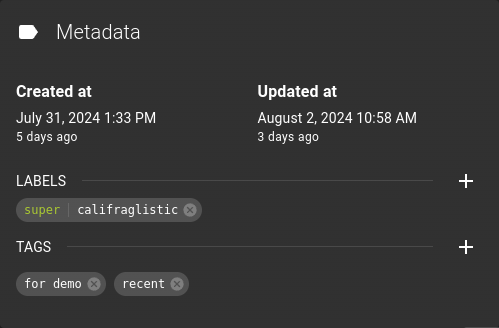 In the UI, each resource will show a Metadata section on its detail page.
Depending on the resource, the UI shows controls for managing tags or labels (and in some cases both).
In the UI, each resource will show a Metadata section on its detail page.
Depending on the resource, the UI shows controls for managing tags or labels (and in some cases both).
To add a tag or a label, click on the button in the respective section.
Using the CLI, you can manage the metadata by providing appropriate parameters when creating or updating resources.
Example:
openstack server create ... [--property <key=value>] [--tag <tag>] <server-name>

openstack server set ... [--property <key=value>] [--tag <tag>] <server>
--tag <tag>- Tag for the server.
- Can be repeated to set multiple tags.
--property <key=value>- Property to add/change for this server
- Can be repeated to set multiple labels
In Terraform, you can manage metadata using the appropriate attributes in your resource definitions.
Example:
IAM Service Account OpenStack Integration
Service Accounts are organization-scoped machine identities that authenticate against our APIs to access and manage resources. A service account can use any of its credentials to authenticate against OpenStack using the application-credential authentication method.
Even though service accounts behave like Application Credentials from the client perspective, they differ from standard OpenStack application credentials in some important ways:
-
Service Accounts are distinct OpenStack Users: Our IAM implementation creates Service Accounts as separate OpenStack users internally. This approach differs from traditional Keystone application credentials and brings some unique characteristics. Certain user-bound resources become associated with these Service Accounts. This applies for instance to SSH Keys.
-
Service Accounts are organization-bound: Service Accounts are organization-bound and manage resources within their own organization.
-
Keystone authentication: When a service account authenticates against OpenStack Keystone, it trades its credential against a project-scoped Fernet token. To do so, the service account needs pass a project ID. Some clients like
python-openstackclientallow this via setting theOS_PROJECT_IDenvironment variable. For clients that do not support this variable for application credentials (like the OpenStack Terraform Provider), you can provide the project ID via the environment variableOS_APPLICATION_CREDENTIAL_ID, by setting it tos11auth:<PROJECT_ID>.