LBaaS
OpenStack Cloud provides load balancing through Load Balancer as a Service (LBaaS).
Currently the OpenStack Cloud provides two APIs/services for Load Balancers: Octavia LBaaS and Neutron LBaaSv2. With the Neutron variant the OpenStack Cloud only supports TCP-based load balancers, while Octavia also supports HTTP and HTTPS.
Below you will find two tutorials in two variants: how to set up an HTTP load balancer (using Octavia load balancers) and how to set up a simple TCP load balancer (this time with Neutron load balancers).
Prerequisites
- You have installed Terraform.
- You know the basics of using the OpenStack CLI-Tools.
- Environment variables are set, like shown in the API-Access-Tutorial.
Git repository with Terraform examples
The Terraform examples used in the tutorials are available on GitHub
This repository is used in both setups described below:
- terraform-examples/lbaas-octavia-http: contains the Terraform recipe for an HTTP load balancer set up using Octavia resources
- terraform-examples/lbaas: contains the Terraform template for a TCP load balancer set up using Neutron LBaaSv2 resources
HTTP Load Balancer with Terraform and Octavia
In this tutorial we demonstrate an Octavia LBaaS setup (in Terraform they call it infrastructure) with the following features:
- an HTTP load balancer
- Round Robin LB algorithm
- Health Monitor for LB pool members (upstream instances)
- a server group with dynamic number of servers
- every upstream node installs nginx via Cloud-Init
- Nginx and a simple static page to show the identity of the back-end
Step one: Create the infrastructure
Open the folder containing the example code and create the infrastructure, providing your SSH key.
$ source openrc  # Set OpenStack authentication environment variables
$ cd terraform-examples/lbaas-octavia-http
$ terraform init

Initializing the backend...

...etc...

$ terraform plan -var ssh_publickey="ssh-rsa AAA...== user@example.com" -out planfile
Alternatively, you can make a file which contains your variables. It would look like this:
# Please change the ssh public keys below to yours
ssh_publickey = "ssh-rsa AAAA...== user@example.com"
Then, plan and apply the Terraform infrastructure.
$ terraform plan -var-file=env.tfvars -out planfile

$ terraform apply planfile
openstack_compute_keypair_v2.keypair: Creating...
openstack_compute_secgroup_v2.sg_ssh: Creating...
openstack_networking_router_v2.router_lbdemo: Creating...
openstack_networking_floatingip_v2.fip_lbdemo_jumphost: Creating...
openstack_networking_network_v2.net_lbdemo: Creating...
openstack_networking_floatingip_v2.fip_lbdemo_lb: Creating...
openstack_compute_secgroup_v2.sg_web: Creating...
openstack_compute_keypair_v2.keypair: Creation complete after 1s [id=keypair]
openstack_compute_secgroup_v2.sg_web: Creation complete after 2s [id=a65c71be-b694-4695-92d9-f310caad86b5]
openstack_compute_secgroup_v2.sg_ssh: Creation complete after 2s [id=422d4735-7d38-4817-ada7-a7ea61c42b35]
...
openstack_lb_member_v2.lb_app_pool_members[1]: Creation complete after 10s [id=02013468-5fa1-4cbc-87f1-5bfd422a4b3a]
openstack_lb_member_v2.lb_app_pool_members[2]: Creation complete after 11s [id=85c42f97-ab31-45aa-9699-5175e86e36f7]
openstack_lb_member_v2.lb_app_pool_members[0]: Creation complete after 17s [id=bb59928c-f81c-4f13-a352-4f6b500ea8fc]

Apply complete! Resources: 22 added, 0 changed, 0 destroyed.

Outputs:

loadbalancer_http = "http://185.56.128.100"
Note that the "Allowed CIDRs" of the listeners in the example are already set to a value (here 0.0.0.0/0). This is in contrast to Heat, where you have to set them in a separate step. The security groups are also configured in the Terraform recipe.
Step two: Check if the load balancer works properly
The call to terraform apply contains the LB floating IP in its output:
Apply complete! Resources: 22 added, 0 changed, 0 destroyed.

Outputs:

loadbalancer_http = "http://185.56.128.100"
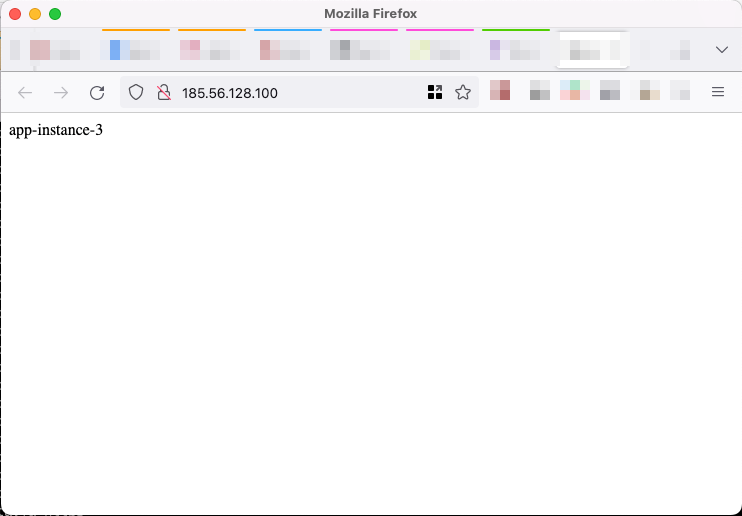
Open AnyApp in your browser via http://<loadbalancer-ip> which shows the IP of the currently-used backend server.
Open AnyApp in other tabs/windows to see the load balancer working.
TCP Load Balancer with Terraform and Neutron LBaaSv2
With Neutron LBaasV2 only TCP-based load balancing is supported. With Terraform, you can attach a security group to the load balancer VIP port as part of creating the infrastructure (with Heat that would be a separate step).
In this tutorial we demonstrate a Neutron LBaaSv2 infrastructure with the following features:
- a TCP load balancer
- Round Robin LB algorithm
- Health Monitor for LB pool members (upstream instances)
- a server group with dynamic number of servers
- every upstream node installs Apache2 and PHP7.4 FPM via Cloud-Init
- "AnyApp" as simple PHP application
Step one: Create the infrastructure
$ source openrc  # Set OpenStack authentication environment variables
$ cd terraform-examples/lbaas
$ terraform init
$ terraform plan -var ssh_publickey="ssh-rsa AAA...user@example.com" -out planfile
$ terraform apply planfile
...
Outputs:

loadbalancer_http = "http://185.56.128.100"
Step two: Check if the load balancer works properly
The example code contains the LB floating IP in its output:
# terraform output <name-of-the-output>

$ terraform output loadbalancer_http
"http://195.192.128.20"
Open AnyApp in your browser via http://<loadbalancer-ip> which shows the IP of the currently-used backend server. Since this example installs more software on the backends than the previous example, it may take a minute before the AnyApp is available.
Open AnyApp in other tabs/windows to see the load balancer working.
Prerequisites
- You should be able to use simple heat templates, like shown in the first steps tutorial.
- You know the basics of using the OpenStack CLI-Tools.
- Environment variables are set, like shown in the API-Access-Tutorial.
Git repository with Heat template examples
The heat template examples used in the tutorials are available on GitHub.
This repository is used in both setups described below:
- heat-examples/lbaas-octavia-http: contains the heat template for an HTTP load balancer set up using Octavia resources
- heat-examples/lbaas: contains the heat template for a TCP load balancer set up using Neutron LBaaSv2 resources
HTTP Load Balancer with Heat and Octavia
In this tutorial we demonstrate an Octavia LBaaS setup with the following features:
- an HTTP load balancer
- Round Robin LB algorithm
- Health Monitor for LB pool members (upstream instances)
- a server group with dynamic number of servers
- every upstream node installs Apache2 and PHP7.0 FPM via HEAT
- "AnyApp" as simple PHP application
Step one: Create the stack
Open the folder containing the example code and create the stack providing your SSH key and the stack name.
$ cd heat-examples/lbaas-octavia-http

# openstack stack create -t lbstack.yaml --parameter key_name=<public-key-name> <stack-name>

$ openstack stack create -t lbstack.yaml --parameter key_name=exampleuser examplelb
+---------------------+--------------------------------------+
| Field               | Value                                |
+---------------------+--------------------------------------+
| id                  | f1ef864b-4acc-4e32-ac92-43c3551b794b |
| stack_name          | examplelb                            |
| description         | A Group of Load Balanced Servers     |
| creation_time       | 2018-03-01T10:03:48Z                 |
| updated_time        | None                                 |
| stack_status        | CREATE_IN_PROGRESS                   |
| stack_status_reason | Stack CREATE started                 |
+---------------------+--------------------------------------+
Step two (optional): Set allowed CIDRs
By default the load balancer will accept connections from everywhere. In order to limit the incoming traffic to certain client IP address ranges you need to configure the listener with allowed CIDRs (one or multiple). In our HEAT template example the listener's name is the stack name followed by "-listener", e.g. "examplelb-listener".
# openstack loadbalancer listener set --allowed-cidr 172.20.0.0/16 --allowed-cidr 10.0.0.0/8 <listener-name>

$ openstack loadbalancer listener set --allowed-cidr 172.20.0.0/16 --allowed-cidr 10.0.0.0/8 examplelb-listener
It is not possible to remove individual CIDRs, so you have to overwrite the list of CIDRs with the new complete list. Or set it explicitly to 0.0.0.0/0 to allow access to everyone again.
Step three: Check if the load balancer works properly
The example code contains the LB floating IP in its output:
# openstack stack show <stack-name> -f value -c outputs

$ openstack stack show examplelb -f value -c outputs
[
{
    "output_value": "http://195.192.128.20:80",
    "output_key": "lburl",
    "description": "This URL is the \"external\" URL that can be used to access the load balancer.\n"
}
]
To retrieve only the URL use the following command:
# openstack stack output show <stack-name> <output-key> -c output_value -f value

$ openstack stack output show examplelb lburl -c output_value -f value

http://195.192.128.20:80
Open AnyApp in your browser via http://<loadbalancer-ip> which shows the IP of the currently-used backend server.
Open AnyApp in other tabs/windows to see the load balancer working.
TCP Load Balancer with Heat and Neutron LBaaSv2
With Neutron LBaasV2 only TCP-based load balancing is supported. In contrast to Octavia-based stacks you have to attach a security group to the load balancer VIP port after the stack was created successfully.
In this tutorial we demonstrate a Neutron LBaaSv2 setup with the following features:
- a TCP load balancer
- Round Robin LB algorithm
- Health Monitor for LB pool members (upstream instances)
- a server group with dynamic number of servers
- every upstream node installs Apache2 and PHP7.0 FPM via HEAT
- "AnyApp" as simple PHP application
Step one: Create the stack
$ cd heat-examples/lbaas

# openstack stack create -t lbstack.yaml --parameter key_name=<public-key-name> <stack-name>

$ openstack stack create -t lbstack.yaml --parameter key_name=exampleuser examplelb
+---------------------+--------------------------------------+
| Field               | Value                                |
+---------------------+--------------------------------------+
| id                  | f1ef864b-4acc-4e32-ac92-43c3551b794b |
| stack_name          | examplelb                            |
| description         | A Group of Load Balanced Servers     |
| creation_time       | 2018-03-01T10:03:48Z                 |
| updated_time        | None                                 |
| stack_status        | CREATE_IN_PROGRESS                   |
| stack_status_reason | Stack CREATE started                 |
+---------------------+--------------------------------------+
Step two: Assign security group to load balancer
After a successful launch the whole setup will not be reachable from the outside until you bind a valid security group to the load balancer port. This step is necessary, because it is not possible to update ports in Heat. See this link for more information on this.
Assign a security group to the port as follows:
To make things easier for you, the example Heat template defines an output section that will format a valid openstack command for this port / security group assignment.
With the following command you can display the formatted port set command:
Step three: Check if the load balancer works properly
The example code contains the LB floating IP in its output:
# openstack stack show <stack-name> -f value -c outputs

$ openstack stack show examplelb -f value -c outputs
[
{
    "output_value": "http://195.192.128.20:80",
    "output_key": "lburl",
    "description": "This URL is the \"external\" URL that can be used to access the load balancer.\n"
},
{
    "output_value": "openstack port set --security-group 11764de3-3889-4be7-9627-3fb2e9431de1 447617cf-5818-4007-9909-ec3cf3fe4912",
    "output_key": "sec_group_connection",
    "description": "This command can be used to connect security groups to the  load balancer port. After the LB is accessible from the outside."
}
]
To retrieve only the URL use the following command:
# openstack stack output show <stack-name> <output key> -c output_value -f value

$ openstack stack output show examplelb lburl -c output_value -f value

http://195.192.128.20:80
Open AnyApp in your browser via http://<loadbalancer-ip> which shows the IP of the currently-used backend server.
Open AnyApp in other tabs/windows to see the load balancer working.
Conclusion
You should now be able to adapt this example to your needs. One of the things you might want to change are the upstream servers. The overall architecture should work for many scenarios.