Rescue Image
Overview
The rescue images are built and tested using Ubuntu 18.04 LTS as core system. They contain a variety of pre-installed tools to rescue your instances and supports most filesystems out of the box.
Info
Since the rescue images are rebuilt regularly it is advisable to always check for the current rescue image name or ID.
Goal
- Launching Nova rescue mode for an instance
- Repairing the (file)system and extract data if required
Prerequisites
- You should be able to use simple heat templates, like shown in the getting-started guide.
- You know the basics of using the OpenStack CLI-Tools
- Environment variables are set, like shown in the API-Access How-To.
Optional: temporary work environment
Click here to show details
Temporary work environment
For this tutorial, we need a Linux environment and the OpenStack client. If you do not have that yet, you can create it with the following commands:
wget https://raw.githubusercontent.com/syseleven/heat-examples/master/kickstart/kickstart.yaml
...
openstack stack create -t kickstart.yaml --parameter key_name=<ssh-key-name> <stack-name> --wait
...
Now we need to connect to the created instance.
The following commands need to be executed in the SSH session.
We also need the OpenStack credentials (openrc-file). You can download the OpenStack RC file from the user menu in the Horizon Dashboard.
Launch Nova Rescue Mode
To be able to connect to the instance volume we need to launch nova rescue mode. For this we use a rescue image that we provide in OpenStack.
First we stop the instance
Then we need to get the current ID of the rescue image
$ openstack image list --public | grep -i rescue

| ace507db-7ac.......... | Rescue Ubuntu 18.04 sys11   | active |
Danger
OpenStack client version 3.13.x is the minimum to be able to launch instances into the rescue mode.
Now we launch the instance into the rescue mode using the rescue image
# openstack server rescue --image < Image name / ID > <server name / uuid>

openstack server rescue --image "Rescue Ubuntu 18.04 sys11" app001
Please wait a few seconds while the rescue image is started.
Login to nova rescue instance
Once you are logged in you can work with the rescue mode.
Via SSH
If you used a SSH key while deploying the instance initially you can login via SSH
Via Console
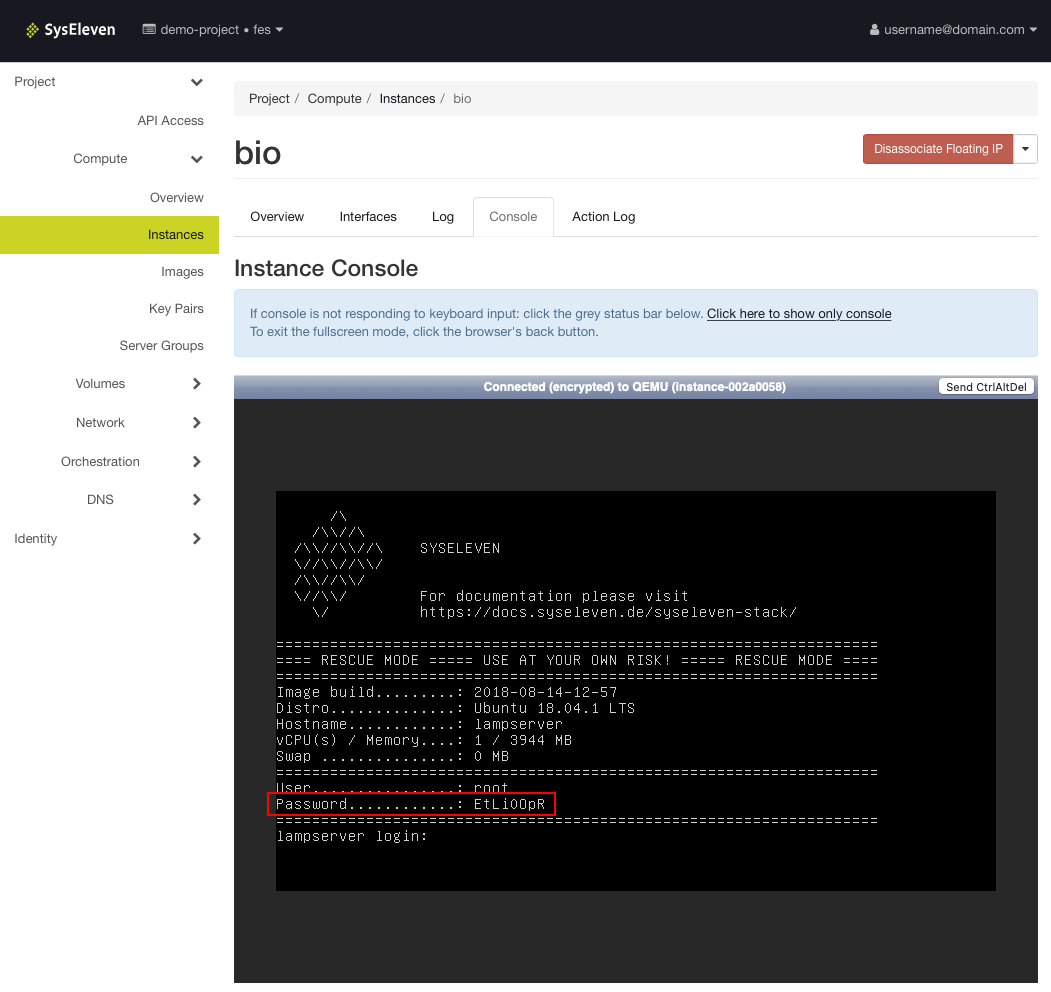
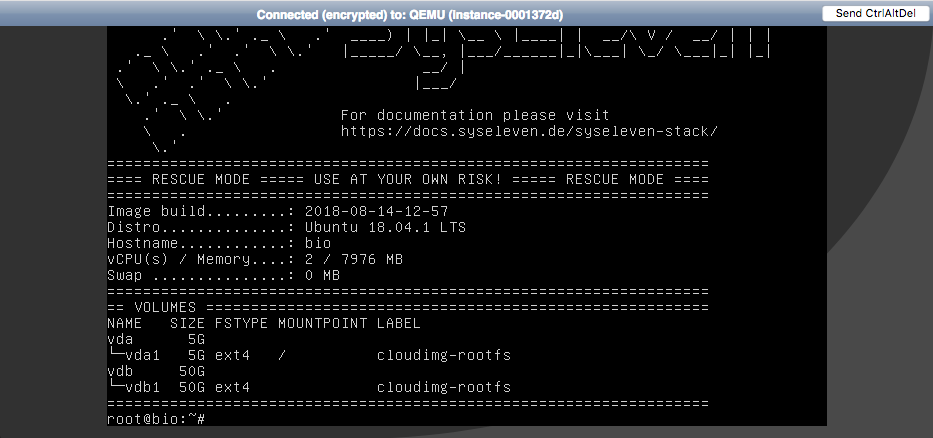
The rescue image generated a random password with every start, which can be viewed on the console. The root user is only allowed to login via the console. Once logged in you can define a password for the system user "Ubuntu" if no SSH key is available and login via SSH is preferred.
Get the root password:
Login with the root password:
Work with the nova rescue instance
Become root user and check for connected block devices. Then mount the device.
$ sudo -i
$ lsblk

NAME   MAJ:MIN RM SIZE RO TYPE MOUNTPOINT
vda    253:0    0   5G  0 disk
└─vda1 253:1    0   5G  0 part /
vdb    253:16   0  50G  0 disk
└─vdb1 253:17   0  50G  0 part

$ mount /dev/vdb1 /mnt/
Now we can start the repairs.
We could check and repair the filesystem using fsck.
We could use testdisk and search for files in damaged filesystems.
$ sudo testdisk /dev/vdb1

TestDisk 7.0, Data Recovery Utility, April 2015
Christophe GRENIER <grenier@cgsecurity.org>
http://www.cgsecurity.org

  TestDisk is free software, and
comes with ABSOLUTELY NO WARRANTY.

Select a media (use Arrow keys, then press Enter):
>Disk /dev/vdb1 - 53 GB / 49 GiB


>[Proceed ]  [  Quit  ]

Note: Disk capacity must be correctly detected for a successful recovery.
If a disk listed above has incorrect size, check HD jumper settings, BIOS
detection, and install the latest OS patches and disk drivers.

[...]
Stop Nova Rescue Mode
First we "unrescue" the instance.
Then we start the instance again.
Conclusion
- We have access to the system/files via the rescue mode.
- The data is accessible on
/mnt/. - If it's an ext filesystem you should have a look in
/mnt/lost+found.