Create a Cluster
Overview
MetaKube clusters are created within a MetaKube project. The nodes, load balancers and volumes are created in your OpenStack Cloud project (or in your AWS account).
Further tutorials will require a working MetaKube cluster.
Prerequisites
To create a cluster, you need to have the "Owner" or "Editor" role in a MetaKube project.
Steps
To create a new cluster, select a MetaKube project from the login page and click the button entry Add Cluster. Clusters are tied to a Project.
Info
You can create as many clusters within one project as you want.
Provider and Data Center
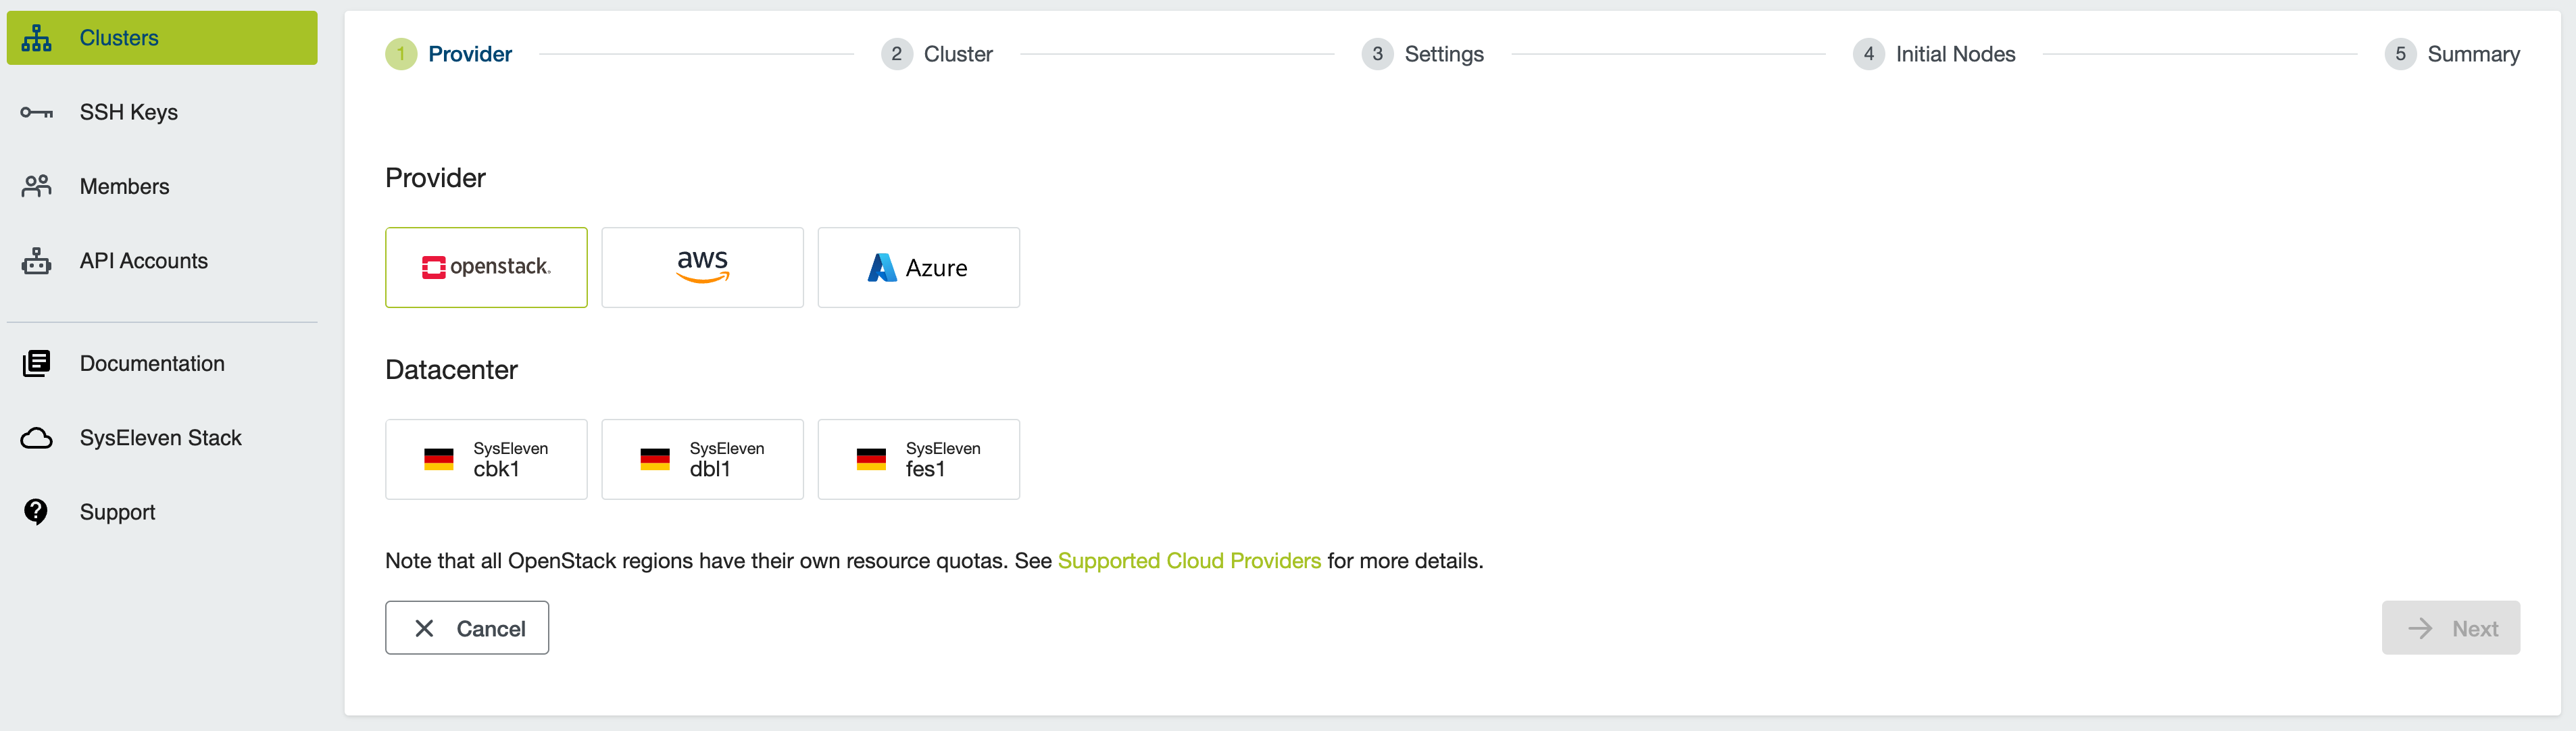
Choose the provider and the region in which you want to create your cluster.
Start by choosing a cloud provider and region, then click Next:
Cluster
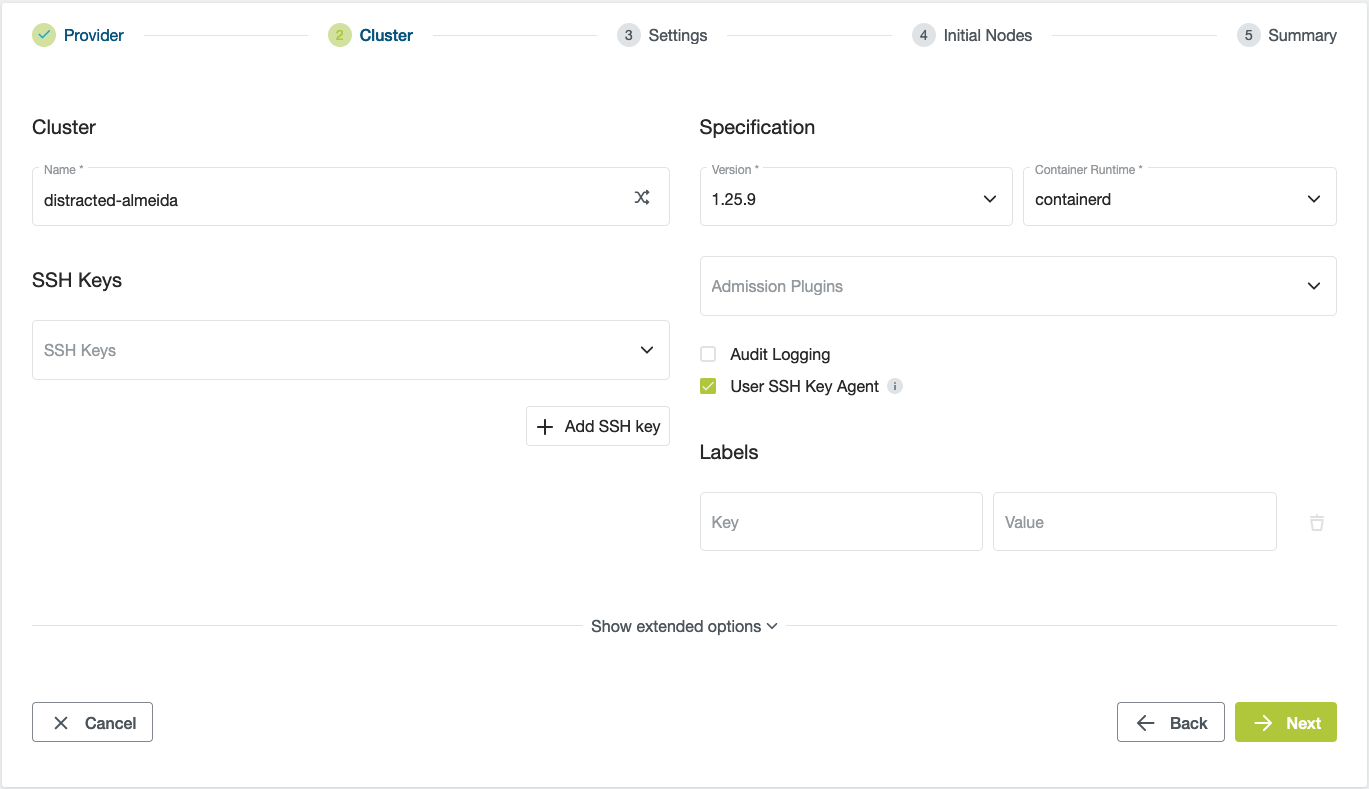
Choose a name and the Kubernetes version for your cluster.
The mandatory fields are:
- Cluster: the human-readable name of your cluster.
- Version: the Kubernetes version which will be used for the cluster. This version can be upgraded in an existing cluster, whenever an upgrade is available.
- Container Runtime: either "containerd" (default) or "Docker" (deprecated, not supported for Kubernetes >= 1.22)
Settings
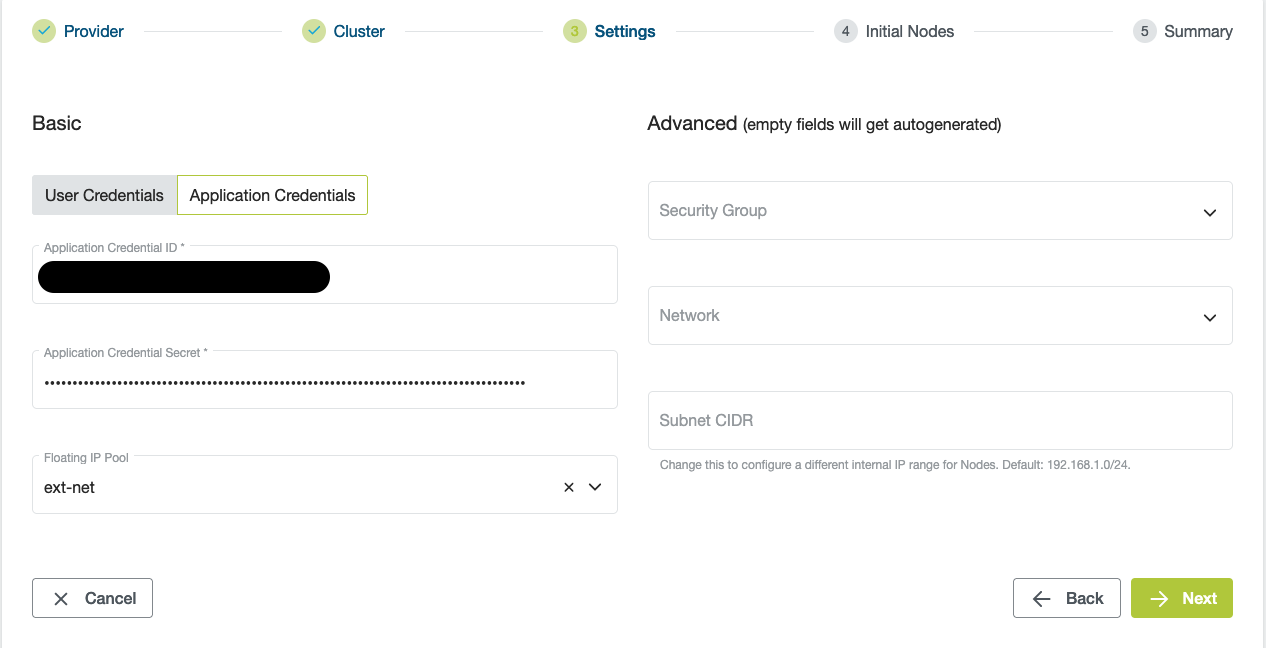
In the next step, enter your cloud credentials to authenticate against the cloud provider.
Info
We recommend to use application credentials, since they are easier to rotate and will not be invalidated if you change your user password in the OpenStack Cloud.
If you use username and password for your OpenStack Cloud, the list of available projects will be loaded. Application credentials are already bound to the project in OpenStack Cloud in which they have been created, so you don't have to choose it again.
The floating IP pool from OpenStack Cloud will be ext-net unless you have requested a custom public IP range.
The fields with advanced settings do not need to be filled in. By default, MetaKube will automatically set up the following resources for a new cluster:
- Network
metakube-<cluster id>with IPv4 subnetmetakube-<cluster-id>with subnet CIDR192.168.1.0/24 - Security group
metakube-<cluster-id>for the worker nodes with all necessary rules - Server group
metakube-<cluster-id>with soft-anti-affinity to spread nodes across different hardware nodes
To specify advanced settings, refer to advanced cluster configuration.
Initial Nodes
For node settings we recommend at least 3 nodes sized m1.small or bigger. For an overview of the possible node flavors see the OpenStack Cloud documentation. It is also possible to choose the operating system and image used for your worker nodes:
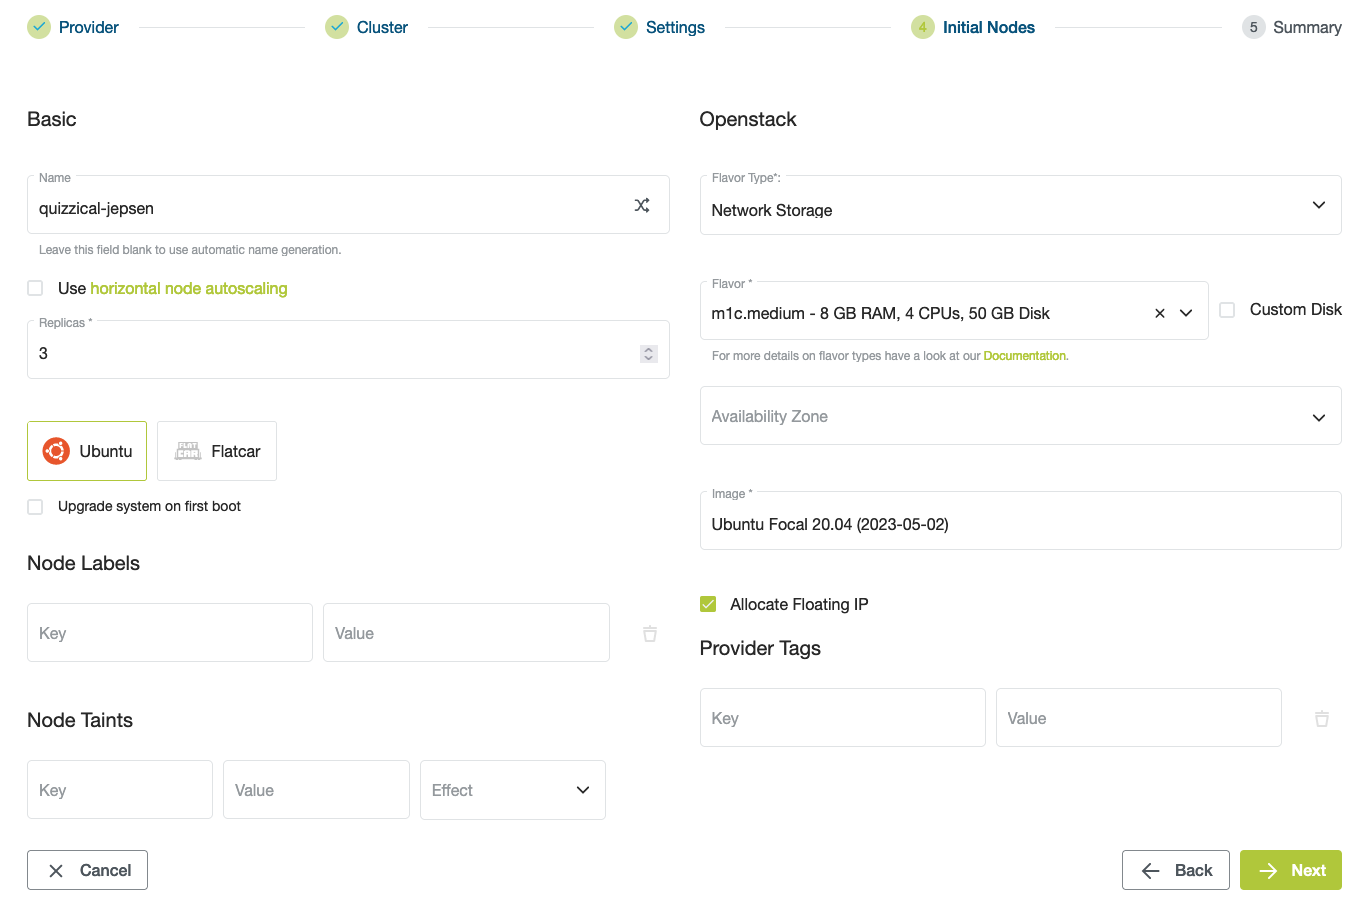
We provide Ubuntu and Flatcar for your cluster nodes OS, with Ubuntu as default. You can also choose a different image available at your OpenStack tenant. To get a list of base images, navigate to Project -> Compute -> Images in the OpenStack Cloud dashboard:
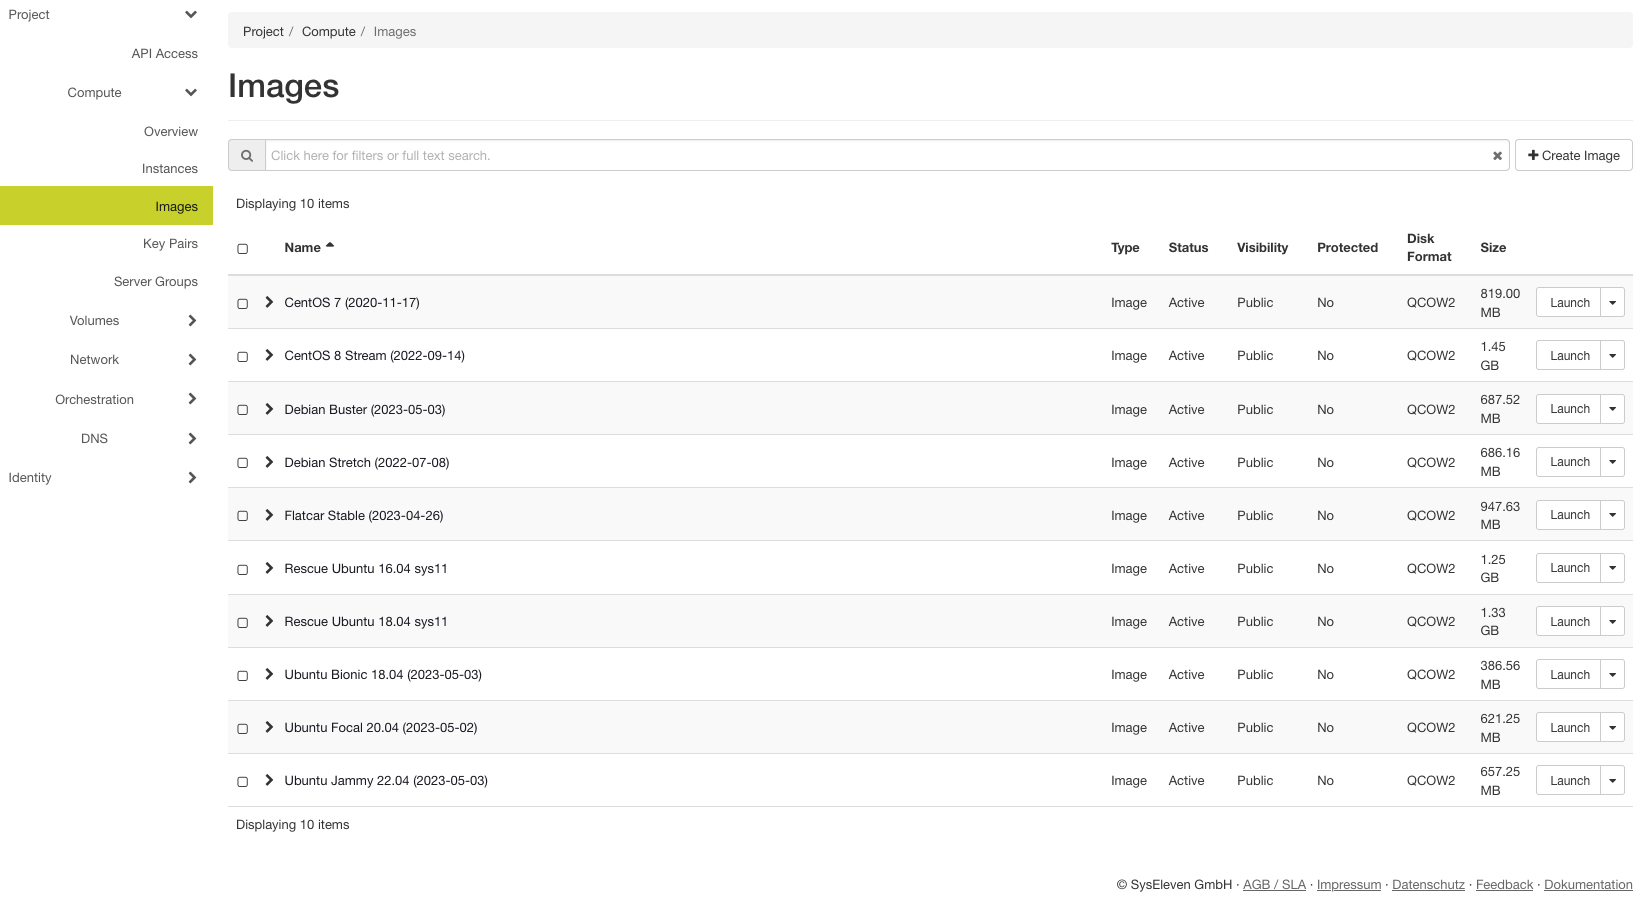
Make sure to enter the exact name of the image you want to run on your machines, as listed in the images tab of the OpenStack Cloud dashboard. See also supported operating systems.
The chosen SSH key added in the Cluster tab will be used for authentication for the default user (for example ubuntu for Ubuntu images) on all worker nodes.
Summary
The summary screen gives you an overview of the data you provided in the previous tabs and some of the default values which will be used for the cluster generation.
Just click Create Cluster for the actual generation.
The process might take a few minutes during which the status of all components will gradually change to green Please note that "CoreDNS" might get a red status for a while, but will switch to green, once the first nodes have joined the cluster.
Validation
After all the control plane components are ready, your cluster will create the configured number of worker nodes in your OpenStack Cloud tenant. Fully created nodes will be marked with a green dot, pending ones with a yellow circle. You can then download the kubeconfig by clicking the button Download Config to be able to use kubectl with your cluster. After all nodes are created you can use kubectl to view and check the status of the created nodes: