Creating a GPU-optimized VM
This guide provides an example of how to create a GPU-optimized VM on SysEleven OpenStack Cloud.
Prerequisites
- Access to SysEleven OpenStack Cloud
- Sufficient permissions to create VMs
- Sufficient quota
Steps
1. Create a VM
In DUS2 region, navigate to the server list and click the create button in the title bar.
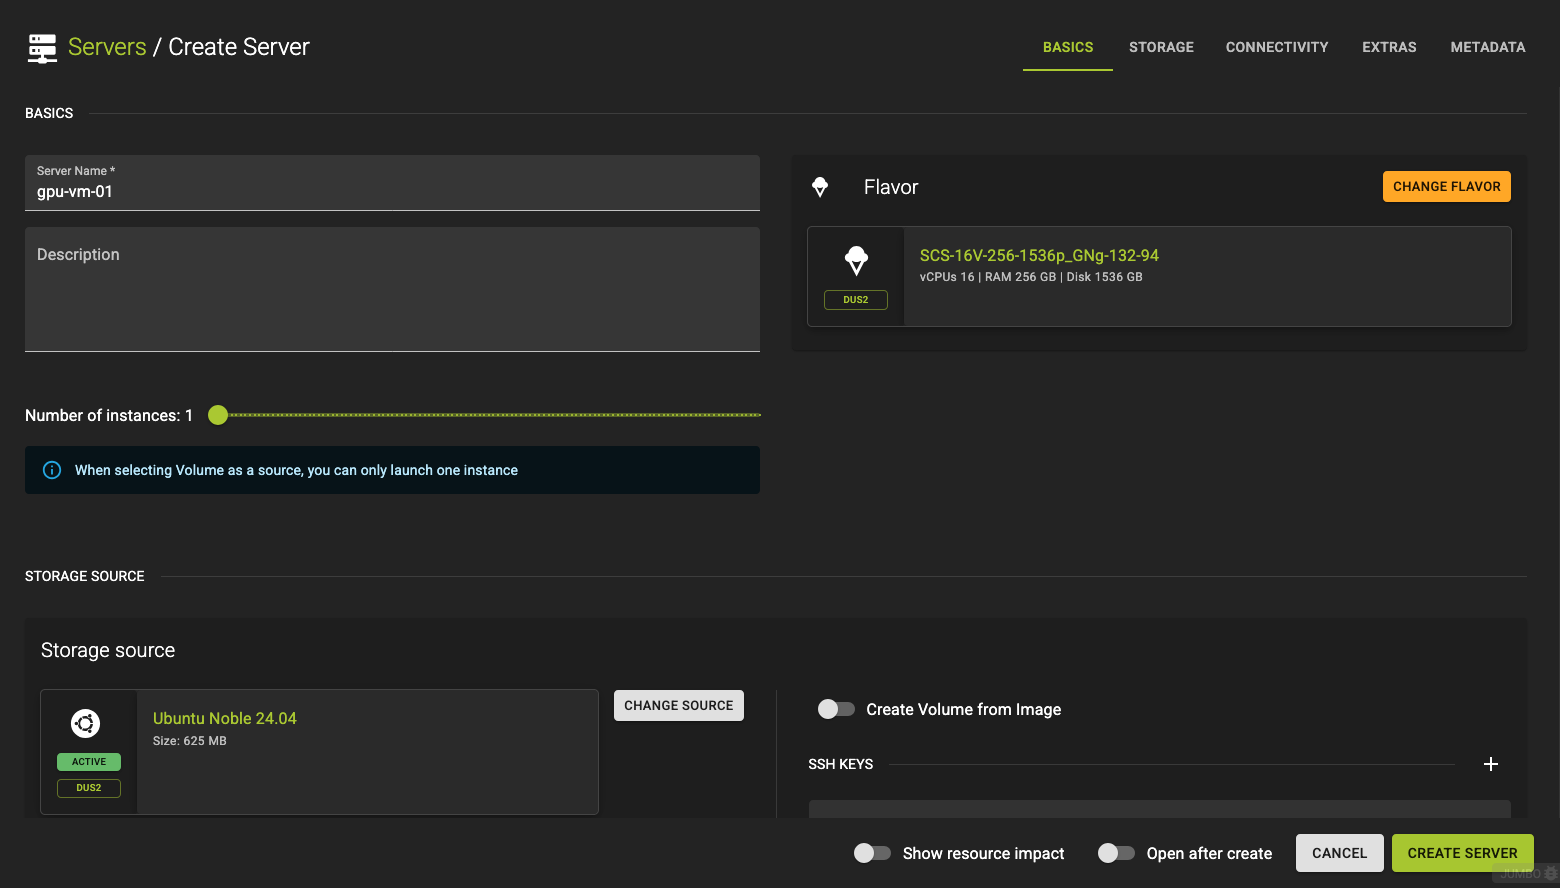
Provide a name and description for your server and select the flavor to be used. For this example we will use SCS-16V-48-400p_GNl-142-48 flavor. A list of the available GPU flavors can be found here.
Basic Creation
openstack server create  --key-name simpleInstanceSSHKey
    --image "Ubuntu Jammy 22.04 (2024-02-29)"
    --flavor SCS-16V-48-400p_GNl-142-48
    --nic net-id=<NetworkIdFromExistingNetwork>
    gpu-vm-01
--key-name- Name of the SSH Key to be deployed on the server
--image- Identifier of image to be used as source
--flavor- Name of the flavor to be used for the server
--nic net-id- Identifier of a network that the server should be connected to. Please note that the network has to already exist and have at least one subnet configured.
Example
openstack server create --image "Ubuntu Jammy 22.04" --flavor SCS-16V-48-400p_GNl-142-48 --nic net-id=83f6ab1c-a5c8-46dd-be2f-6ab0c5792954 gpu-vm-01
Example:
Note
Ensure that you adjust the parameters (e.g. flavor) based on your specific setup
# Terraform Provider configuration

terraform {
  required_providers {
    openstack = {
      source  = "terraform-provider-openstack/openstack"
    }
  }
}

# Select latest OpenStack Ubuntu 24.04 Image

data "openstack_images_image_v2" "image" {
  most_recent = true

  visibility = "public"
  properties = {
    os_distro  = "ubuntu"
    os_version = "24.04"
  }
}

# Upload SSH key (please change this to your local public key file)

resource "openstack_compute_keypair_v2" "ssh_key" {
  name       = "ssh-public-key"
  public_key = file("~/.ssh/id_rsa.pub")
}

# Network configuration

data "openstack_networking_network_v2" "ext_net" {
  name = "ext-net"
}

resource "openstack_networking_network_v2" "network" {
  name           = "net"
  admin_state_up = "true"
}

resource "openstack_networking_subnet_v2" "network" {
  name            = "subnet"
  network_id      = openstack_networking_network_v2.network.id
  cidr            = "10.20.30.0/24"
  ip_version      = 4
  enable_dhcp     = "true"
  dns_nameservers = ["1.1.1.1", "8.8.8.8"]
}

resource "openstack_networking_port_v2" "os_server_port" {
  name               = "os_server_port"
  admin_state_up     = "true"
  network_id         = openstack_networking_network_v2.network.id
  security_group_ids = [openstack_networking_secgroup_v2.ssh_access_secgroup.id,
  ]

  fixed_ip {
    subnet_id = openstack_networking_subnet_v2.network.id
  }
}

resource "openstack_networking_router_v2" "network" {
  name                = "router"
  admin_state_up      = "true"
  external_network_id = data.openstack_networking_network_v2.ext_net.id
}

resource "openstack_networking_router_interface_v2" "network" {
  depends_on = [openstack_networking_secgroup_v2.ssh_access_secgroup]
  router_id  = openstack_networking_router_v2.network.id
  subnet_id  = openstack_networking_subnet_v2.network.id
}

# Security Group for SSH access

resource "openstack_networking_secgroup_v2" "ssh_access_secgroup" {
  name        = "ssh_access_secgroup"
  description = "Security group for ssh access"
}

resource "openstack_networking_secgroup_rule_v2" "ssh_rule" {
  direction         = "ingress"
  ethertype         = "IPv4"
  protocol          = "tcp"
  port_range_min    = 22
  port_range_max    = 22
  remote_ip_prefix  = "0.0.0.0/0"
  security_group_id = openstack_networking_secgroup_v2.ssh_access_secgroup.id
}

# Create an OpenStack VM
resource "openstack_compute_instance_v2" "os_server" {
  name        = "server"
  image_name  = data.openstack_images_image_v2.image.name
  flavor_name = "m1.small"
  key_pair    = openstack_compute_keypair_v2.ssh_key.name

  network {
    uuid = openstack_networking_network_v2.network.id
    port = openstack_networking_port_v2.os_server_port.id
  }

  lifecycle {
    create_before_destroy = true
    ignore_changes        = [flavor_name, image_name]
  }
}

# Create a floating IP / public IP
resource "openstack_networking_floatingip_v2" "floatip_1" {
  pool = "ext-net"
}

# Associate the floating IP
resource "openstack_networking_floatingip_associate_v2" "floatip_1" {
  floating_ip = openstack_networking_floatingip_v2.floatip_1.address
  port_id = openstack_networking_port_v2.os_server_port.id
}
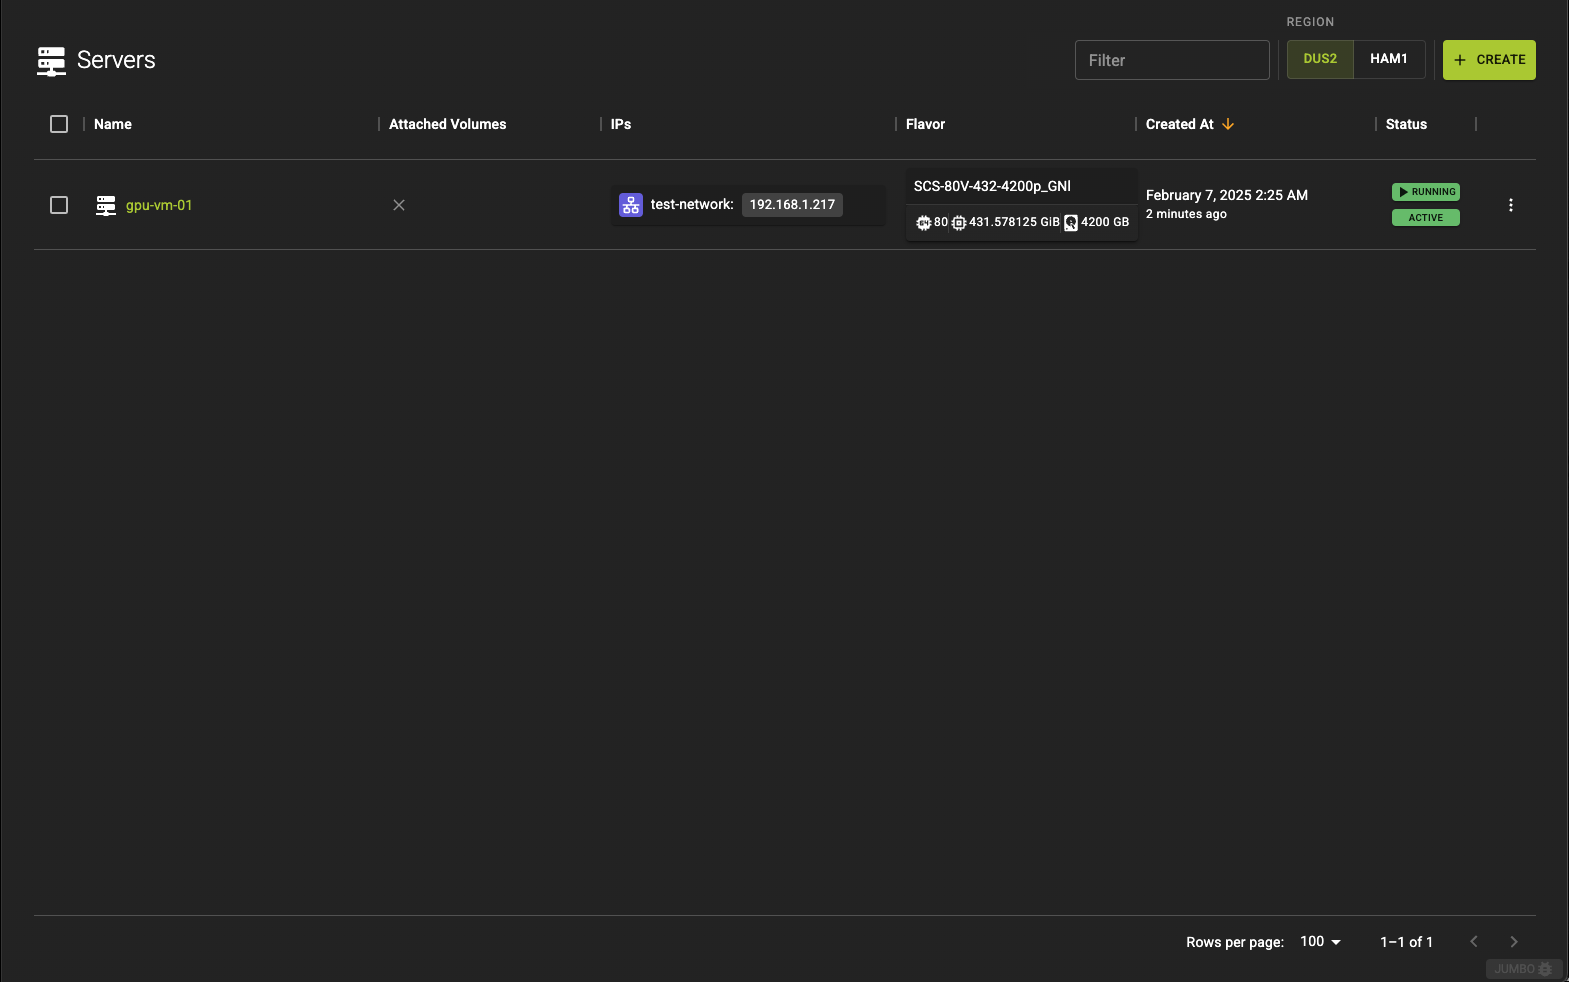
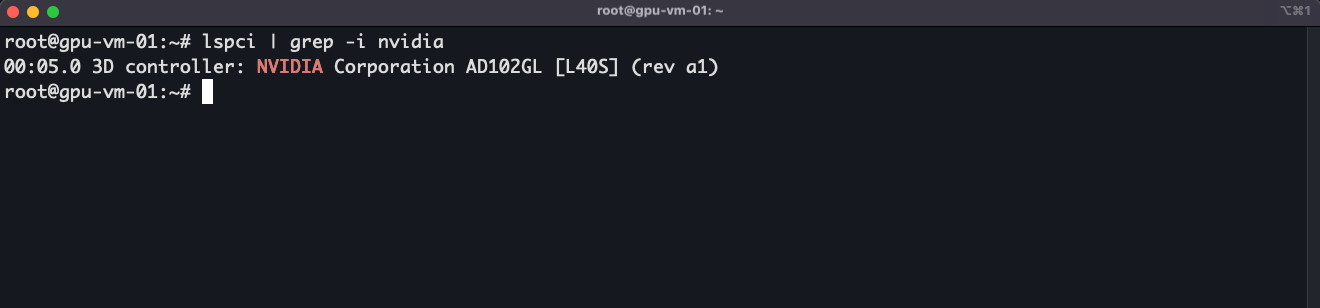
2. Connect to the VM using CLI
Once the server has been initialized, connect to the server using CLI and verify the GPU is identified:
3. Install GPU drivers
Add Nvidia's official PPA to get the latest drivers
Install Ubuntu drivers common package to check for the available drivers:
Now run the following to list the available drivers:
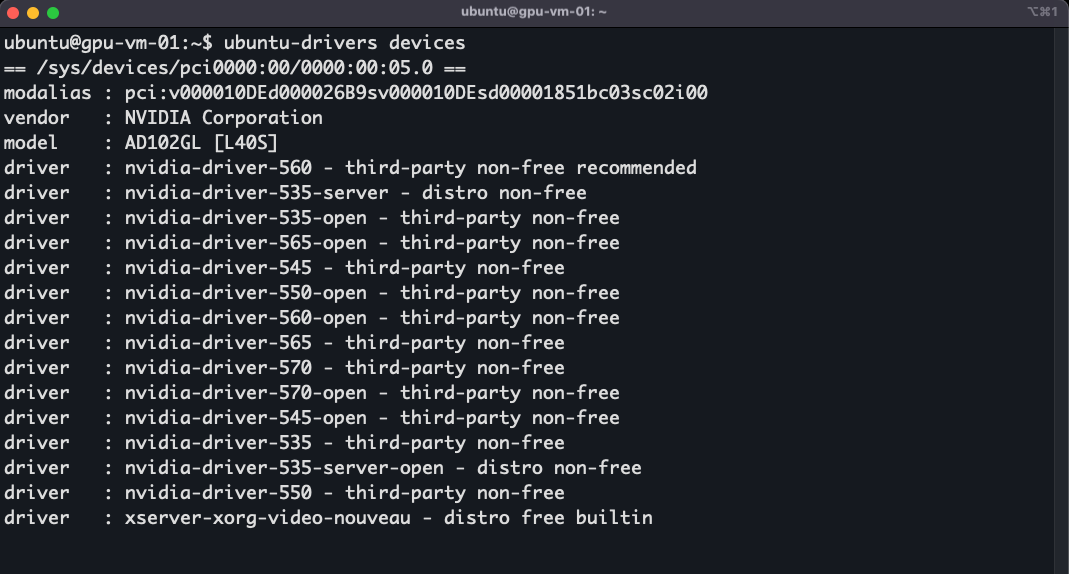
Install the driver packages of your choice. With the ubuntu-drivers devices command you can also find the recommended driver for your GPU indicated by recommended at the end of the driver name:
4. Install NVIDIA CUDA toolkit
To utilize your GPU to its full potential you will need to install the NVIDIA CUDA toolkit as well.
Warning
This is the approach for Ubuntu 24.04. Check the official page for different operating systems, distributions, and toolkit versions.
Add the package repository and install the keyring:
wget https://developer.download.nvidia.com/compute/cuda/repos/ubuntu2404/x86_64/cuda-keyring_1.1-1_all.deb
sudo dpkg -i cuda-keyring_1.1-1_all.deb
Update the APT repository cache:
Install the latest cuda-toolkit:
Install the NVIDIA GDS package:
Reboot the server:
Export the path to .bashrc:
(Optional) Test the CUDA utilization with the NVIDIA CUDA samples.
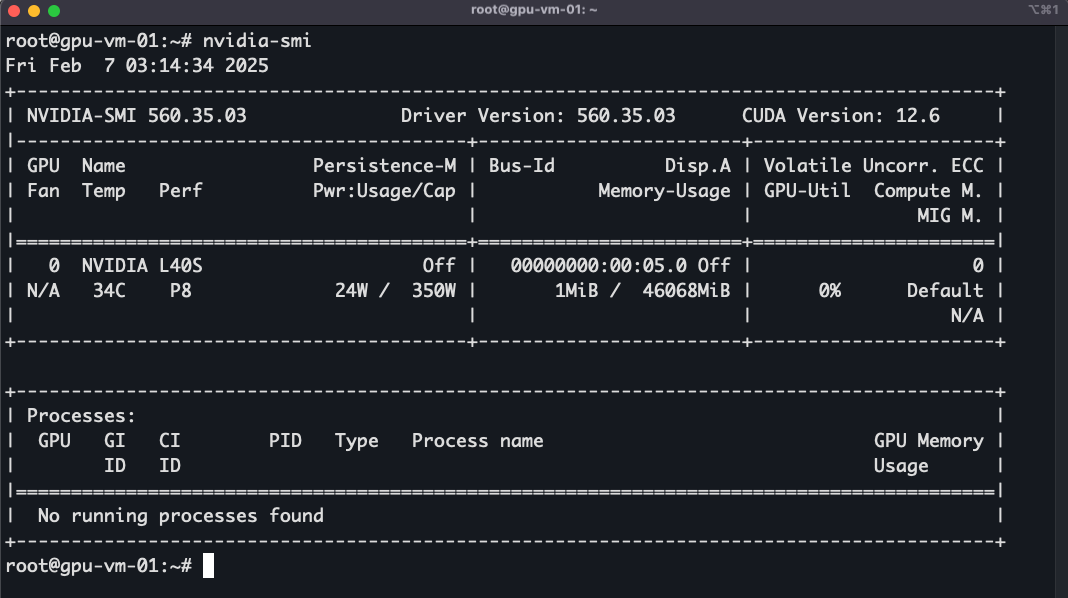
5. Monitor usage and other parameters
nvidia-smi is command-line tool that comes with NVIDIA drivers, used to monitor and manage your GPU. You can check GPU utilization, temperature, memory usage, and more:
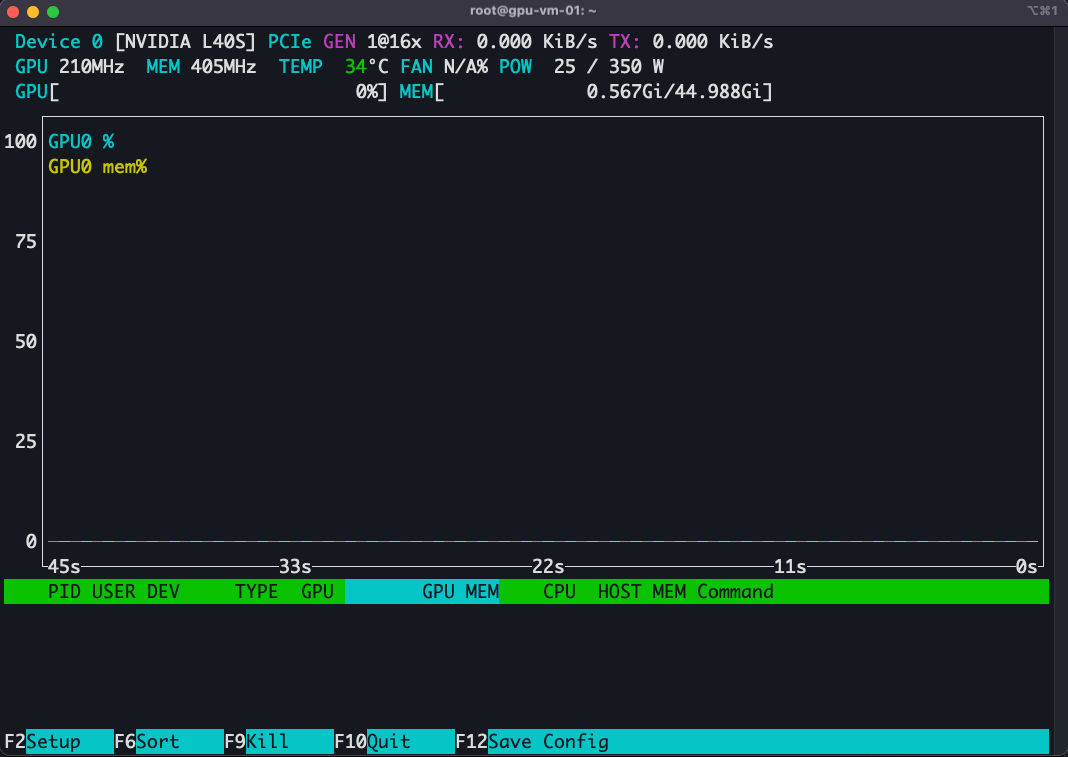
NVTOP
You can use nvtop to monitor the GPU usage which is a tool to monitor NVIDIA GPUs in real-time. It provides a more detailed and user-friendly interface than nvidia-smi:
Install nvtop via:
Conclusion
You have successfully launched a GPU-optimized VM, installed the necessary drivers & useful packages to monitor the GPU usage.