Clusters
Concepts
A Kubernetes cluster consists of interconnected nodes that collaborate to run containerized applications. Containers package applications with their dependencies and services into a single unit, making them more portable and efficient than traditional virtual machines.
Nodes in a Kubernetes cluster can be physical servers, virtual machines, or cloud instances, each capable of running multiple containers. Kubernetes oversees container distribution, scaling, load balancing, and maintaining the desired state of applications.
Containers are more lightweight than virtual machines as they share the host operating system's kernel, avoiding the need for a full OS per application. This leads to faster start-up times and better resource efficiency.
List Clusters
 To list clusters click on the cluster icon in the sidebar
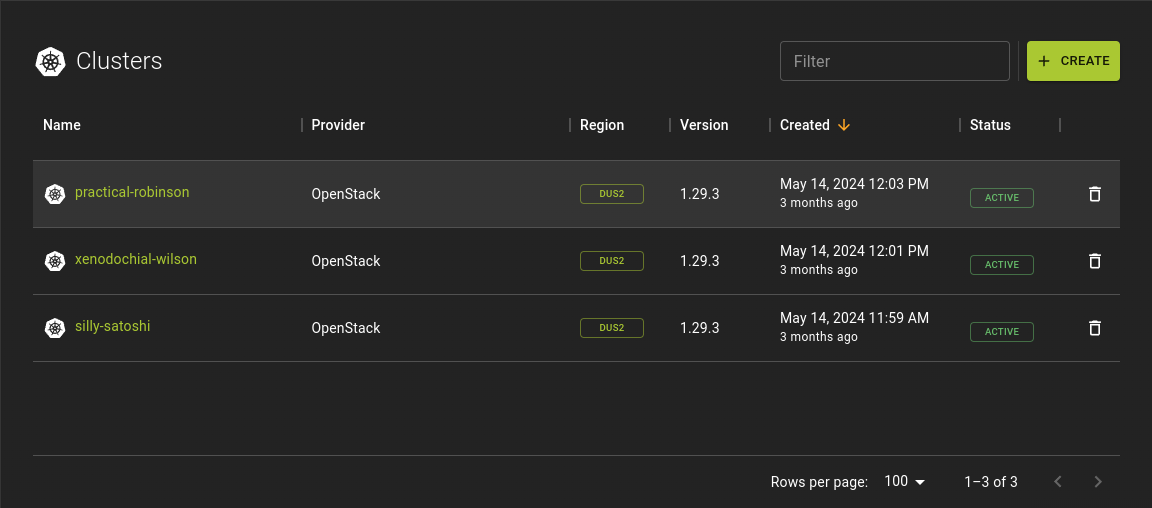
From the cluster list you can
- Navigate to the details page of a cluster by clicking on the cluster name
- Delete a cluster using the :materia-delete: option in each row
- Create a new Cluster using the
CREATEbutton in the title bar
Usage
GET https://metakube.syseleven.de/api/v2/projects/{project_id}/clusters
Create Cluster
To create a cluster click on Create in the title bar of the cluster list
Select Provider
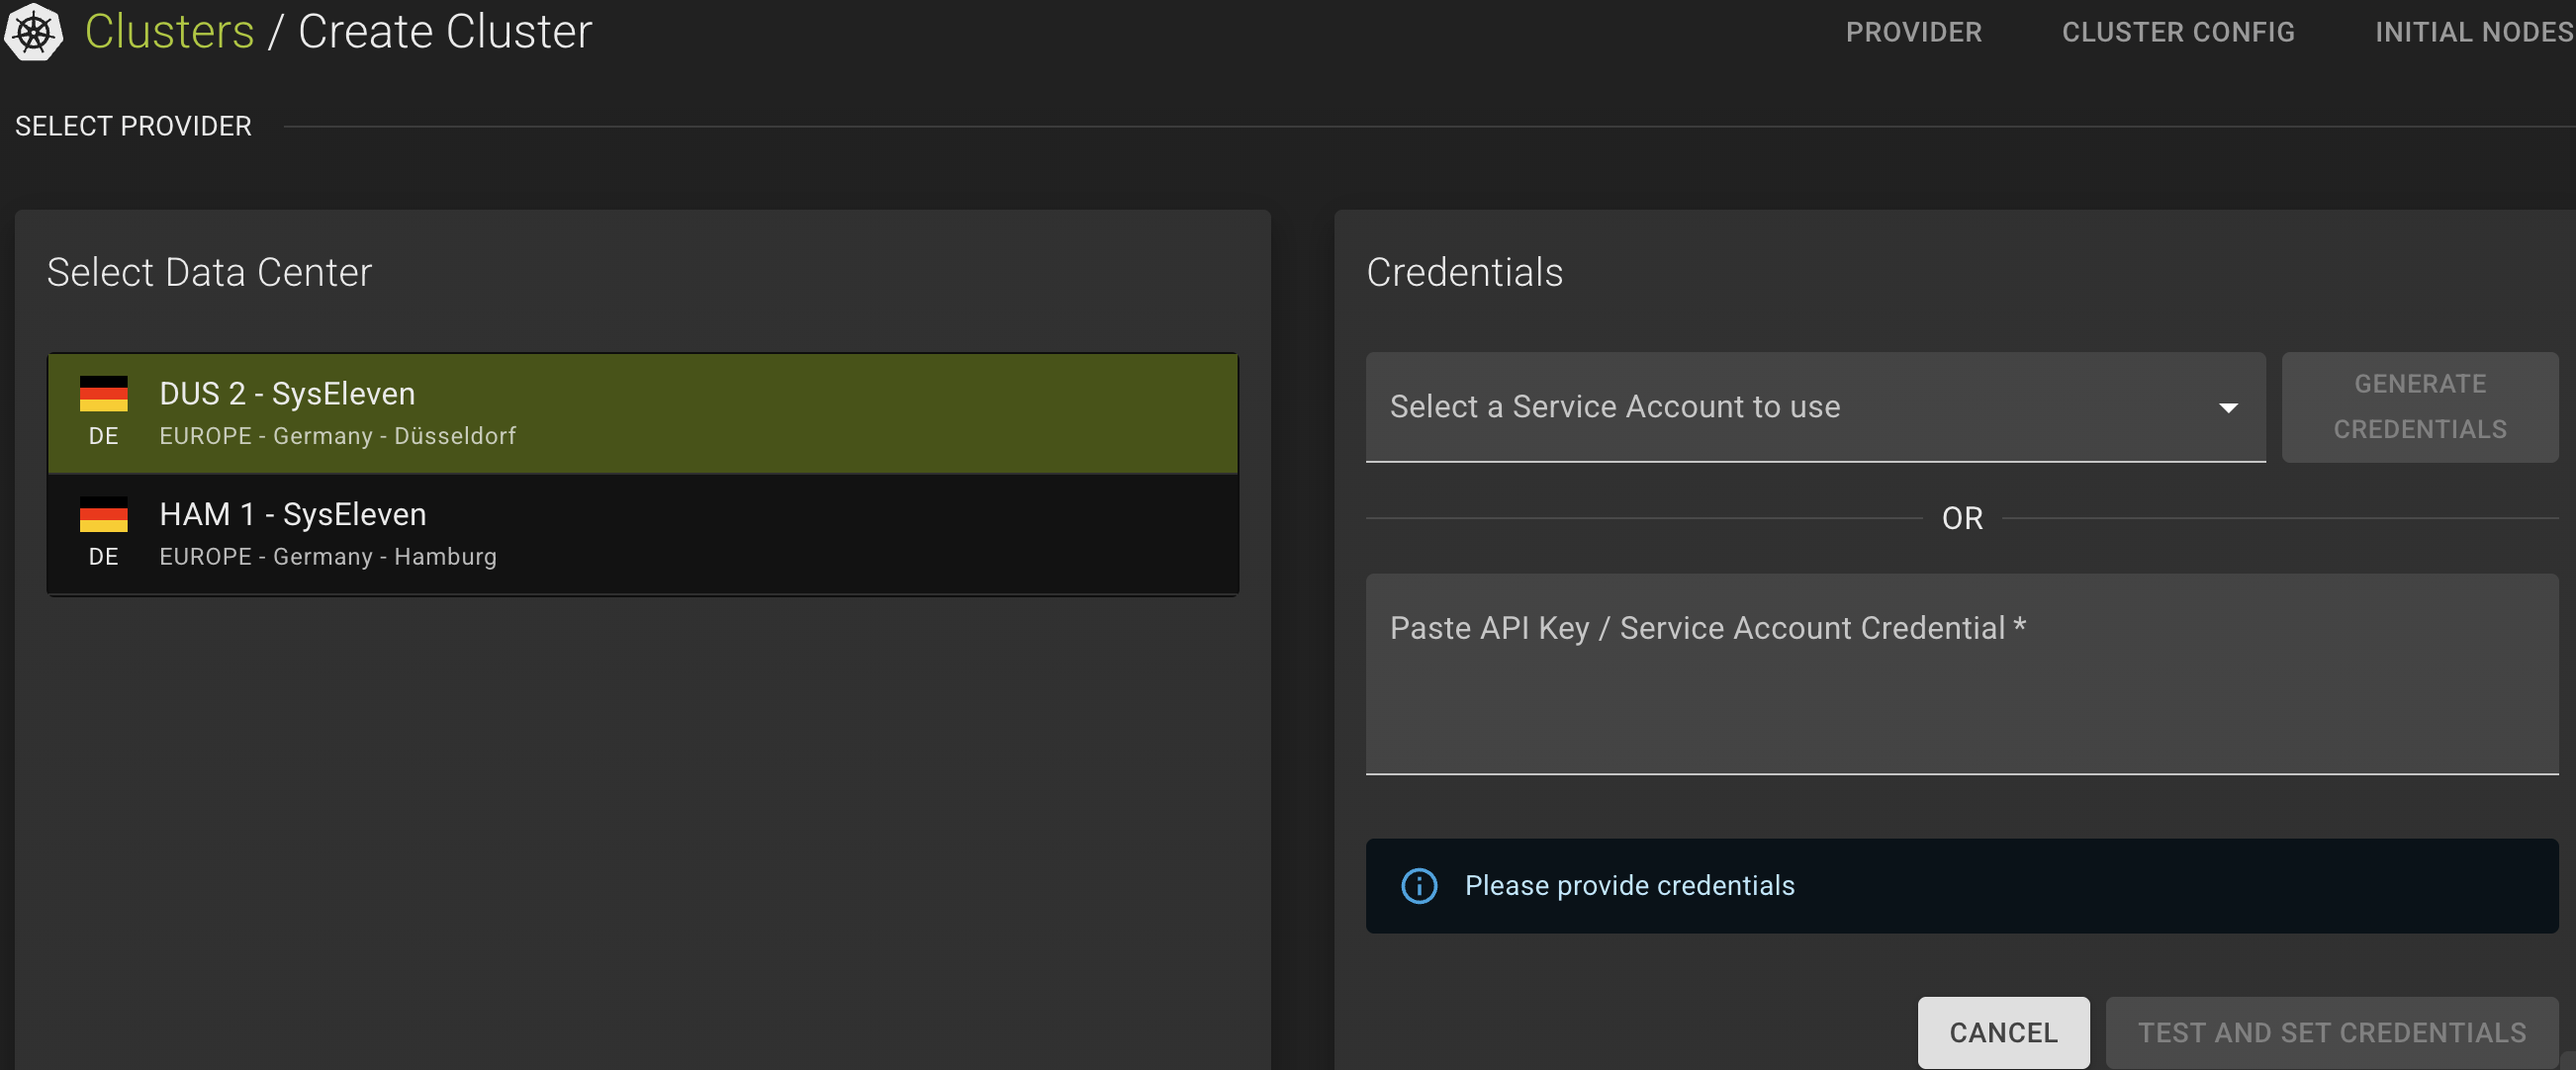
First you will need to select a region in which the nodes will be deployed.
Then you will need to provide a Service Account previously created or API Key that will be used to perform the necessary provisioning jobs for setting up the infrastructure.
Check service account information to create the right Service Account.
Service account secret can be specified manually, or just generate a new ones from the Generate Credentials section of the cluster just after the region and service account selection.
Configure Provider Network

Floating IP Pool- Select which pool should be used to obtain floating public IPs. In most setups this should be "ext-net"
Security Group- Select the security group your nodes will be part of. This will determine the traffic that can enter and exit the nodes. Think of it as IP tables.
Network- Allows you to select which network the cluster will be connected to. Leave it blank to let metakube generate a new network for you.
Subnet CIDR- Allows you to specify the address range for the subnet the cluster will be connected to.
Configure Cluster
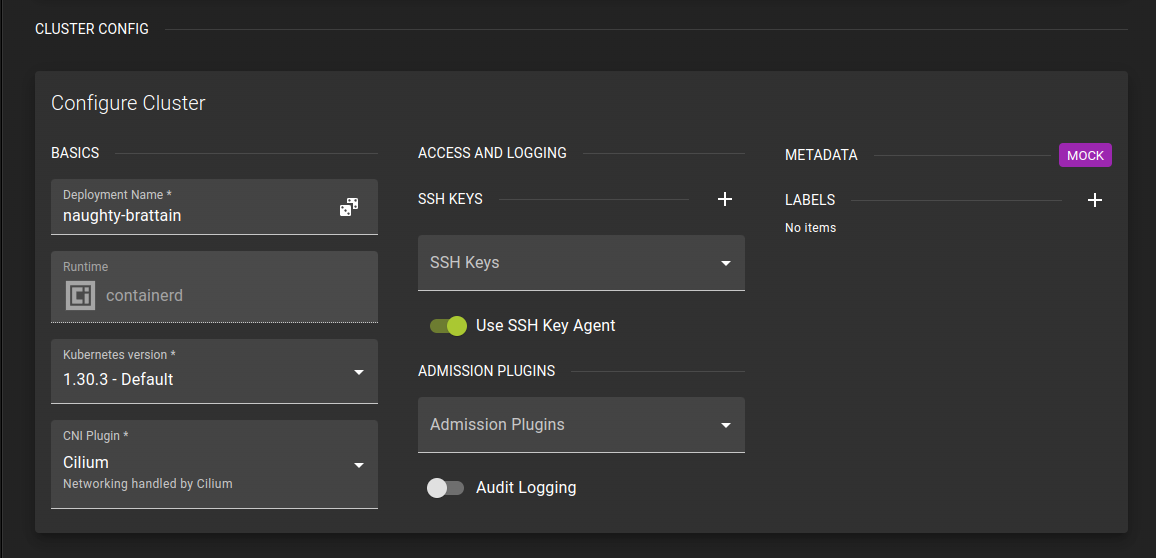 Once the provider is configured you can proceed to configuring the cluster itself.
Basics
- Select a name for your cluster. MetaKube will suggest a random name for you but feel free to change it
- Select the version of Kubernetes to be used for the cluster. The most recent version is preselected for you.
- Select the CNI plugin for the cluster. We suggest to use Cilium (default)
Access and Logging
Here you control access to your cluster.- Add an SSH key and select whether you want to enable the SSH Key agent
- Select the admission plugins you want to use
- Toggle whether you want to use access logging
Metadata
Provide Metadata in the form of labels to facilitate addressing resources and automationConfigure Initial Node Deployment
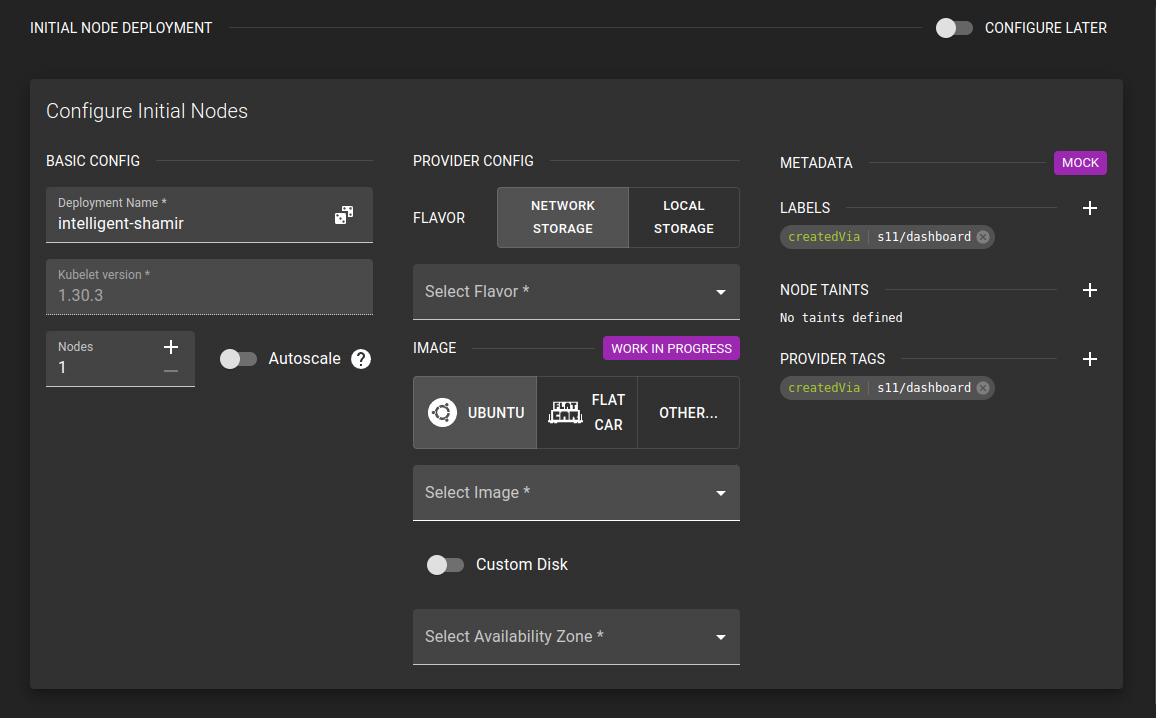
Now you can configure the initial node pool for your cluster.
Basic Configuration
- Name your deployment. The UI will suggest a name for you but feel free to change it.
- Kubelet version
- Define the number of nodes in your deployment.
- You can specify an absolute number
- You can also configure the node pool to scale automatically between a minimum and maximum number
Provider Specific Configuration
Here you configure additional settings for openstack.
Flavor- Determines the size / specs of the server.
Image- Select which image should be used to provision the nodes.
Custom Disk- Allows you to override the default size of the volumes on each node
Availability Zone- Select the availability zone for the nodes
Metadata
Provide Metadata in the form of labels to facilitate addressing resources and automationFinalize and confirm
Now that the configuration is complete click create cluster.
This will start the provisioning process and you will be taken back to the list of cluster where your new cluster will appear shortly.
It will take a while until all components of your cluster become available. Once the cluster provisioning is complete you can click on the name of the cluster and perform further operations from the clusters detail page.
E.g. You can add more node deployments, modify the existing one or manage access to your cluster
Usage
POST https://metakube.syseleven.de/api/v2/projects/{project_id}/clusters
Example:
# Terraform Provider configuration

terraform {
  required_providers {
    metakube = {
      source  = "syseleven/metakube"
    }
    openstack = {
      source = "terraform-provider-openstack/openstack"
    }
  }
}

provider metakube {
  host = "https://metakube.syseleven.de"
}

# SSH public key variable

variable public_key_path {
  description = "sshkey file"
    default = "~/.ssh/id_rsa.pub"
}

# MetaKube cluster configuration

data openstack_images_image_v2 "image" {
  most_recent = true

  visibility = "public"
  properties = {
    os_distro  = "ubuntu"
    os_version = "24.04"
  }
}

resource "metakube_sshkey" "sshkey" {
 name       = "ssh-pub-key"
 project_id = "PROJECT-ID"
 public_key = file(var.public_key_path)
}

resource "local_file" "kubeconfig" {
  content  = metakube_cluster.cluster.kube_config
  filename = "kube.conf"
}

data "metakube_k8s_version" "cluster" {
  major = "1"
  minor = "31"
}

resource "metakube_cluster" "cluster" {
  name       = "example-cluster"
  dc_name    = "DATACENTER-NAME"
  project_id = "PROJECT-ID"
  sshkeys = [metakube_sshkey.sshkey.id]
  spec {
    enable_ssh_agent = true
    version = data.metakube_k8s_version.cluster.version
    cloud {
      openstack {
        application_credentials {
          id     = "APP-CREDENTIALS"
          secret = "APP-SECRET"
        }
       floating_ip_pool = "ext-net"
      }
    }
    cni_plugin {
      type = "cilium"
    }
  }
}

resource "metakube_node_deployment" "node-deployment" {
  name       = "node-deployment"
  cluster_id = metakube_cluster.cluster.id
  project_id = "PROJECT-ID"
  spec {
    replicas = 3
    template {
      cloud {
        openstack {
          flavor = "m1.small"
          image  = data.openstack_images_image_v2.image.name
          use_floating_ip = true
        }
      }
      operating_system {
        ubuntu {
          dist_upgrade_on_boot = false
        }
      }
      versions {
        kubelet = data.metakube_k8s_version.cluster.version
      }
    }
  }
}
Inspect and Modify Cluster
 You can modify the cluster on the details page of a cluster
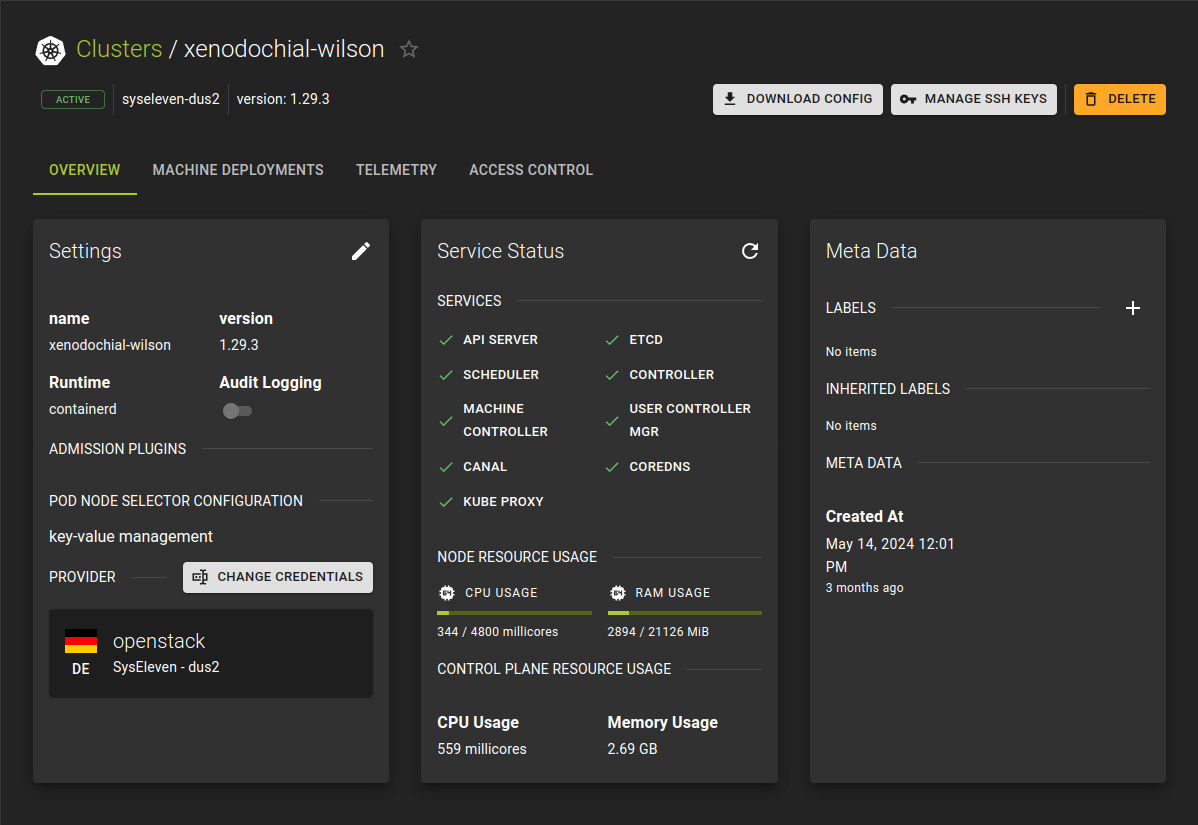
The details page is composed of four tabs
Overview
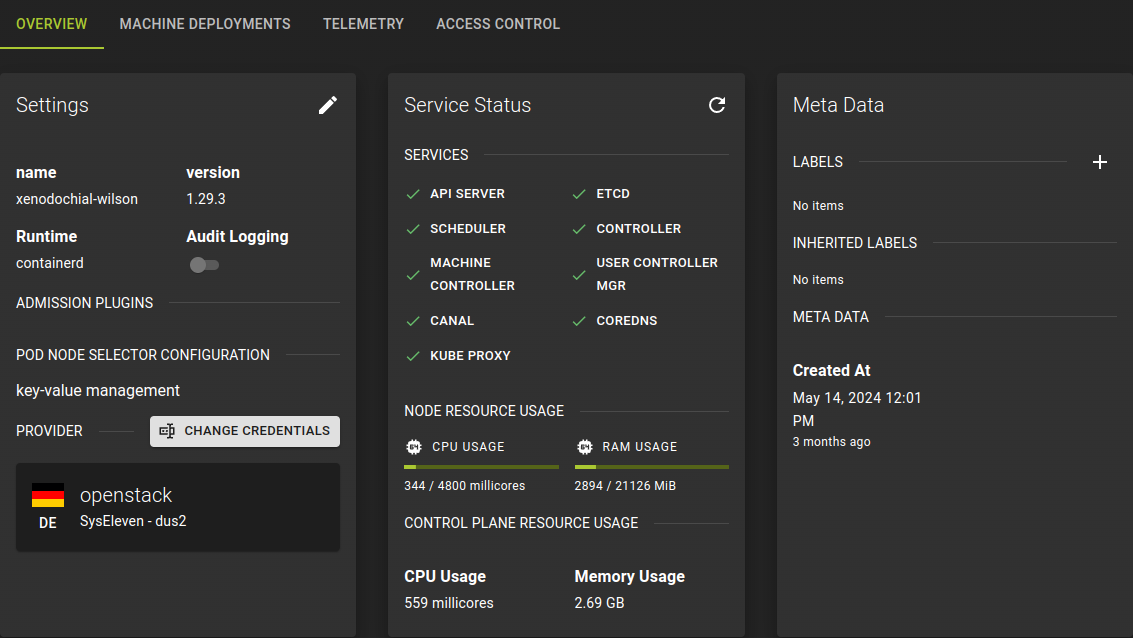
Here you can see the current state of your cluster as well as perform basic modifications to your cluster such as selecting another version of kubernetes.
Machine Deployments
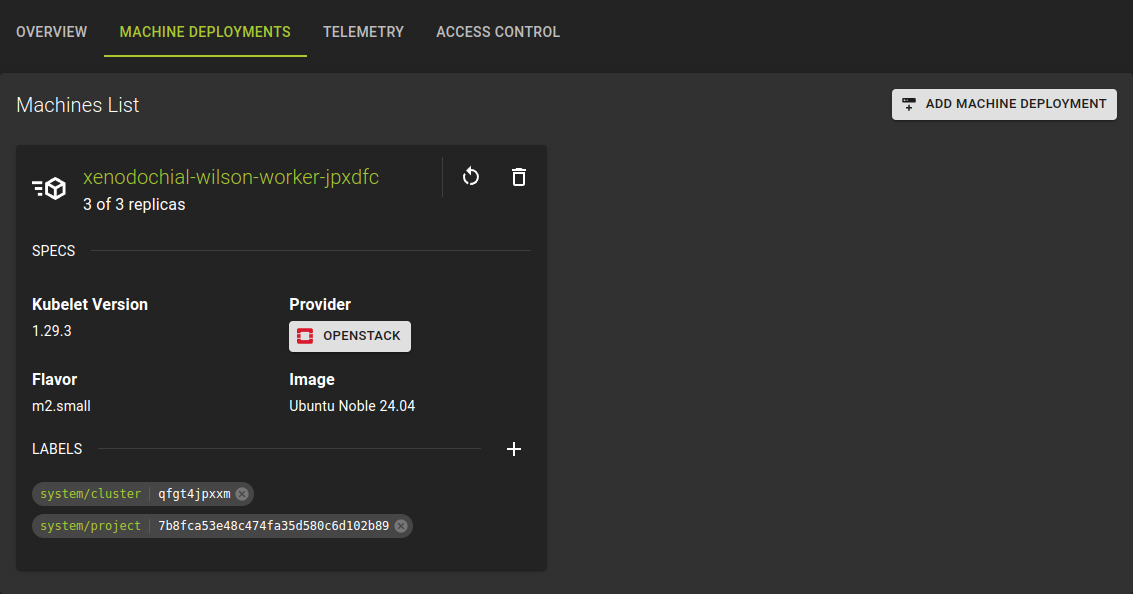
Here you can see the machine deployments belonging to your cluster and manage them.
Telemetry
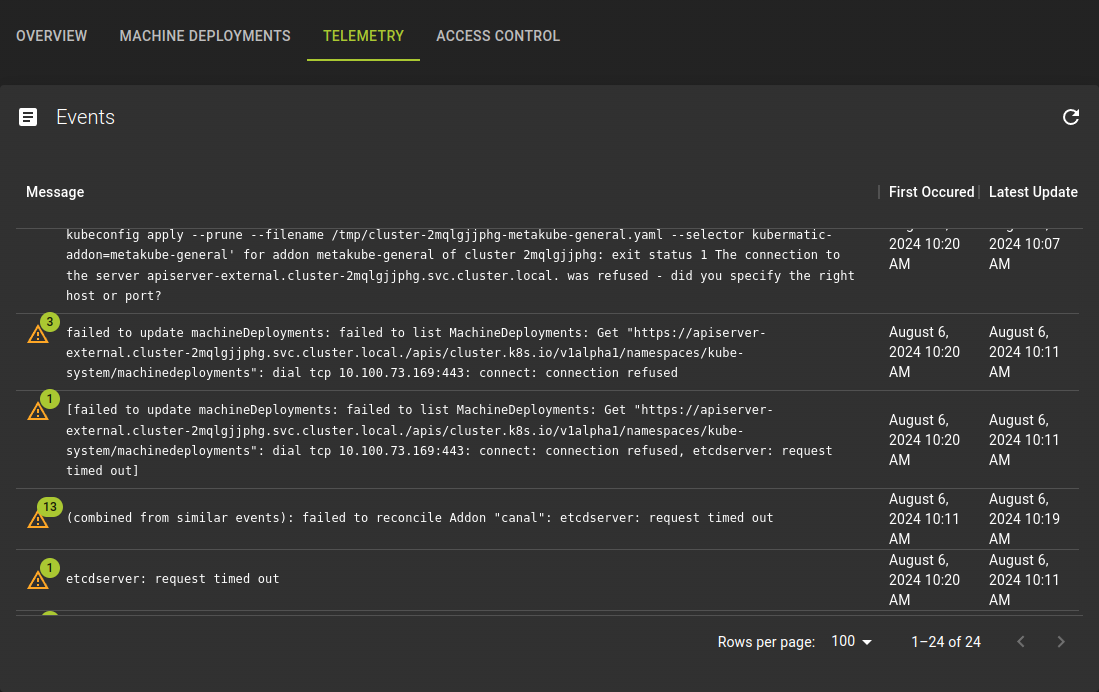
This tabs holds an event log for your cluster where you can view what operations were performed on the cluster and its machined deployments.
Access Control
Here you can control role based access to your cluster and namespace.
Also you can obtain a kube config needed for interaction with your cluster e.g. using kubectl.
Usage
Modify Cluster
To modify a cluster navigate to the cluster detail page by clicking its name on the cluster list.
The details page gives you access to all aspects of the cluster and you can modify the cluster itself and its node deployments.
Basic changes to cluster
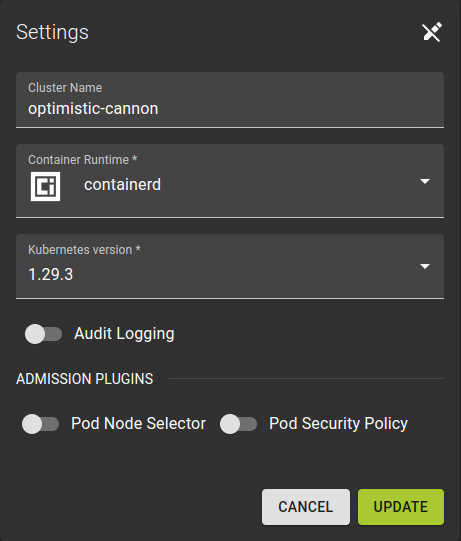
To make changes to the cluster click the on the Settings card.
This will put the settings card into edit mode and allow you to change:
Cluster Name- Name of cluster
Kubernetes Version- Version of Kubernetes to be used.
Change Credentials
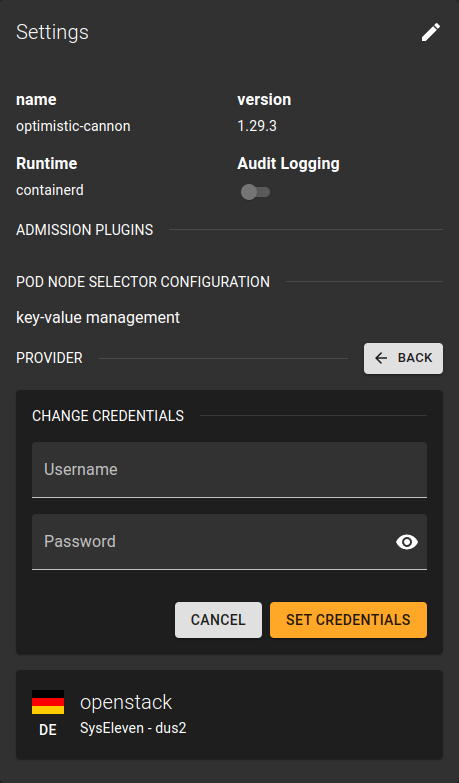
Here you can change the credentials that will be used to interact with openstack when lifecycling nodes.
Warning
We do not recommend changing credentials unless it is really necessary.
Usage
Manage Machine Deployments
To view all node deployments belonging to the cluster switch to the Machine Deployments tab in the cluster details. From here you can manage, add and remove node deployments
Add Machine Deployment
To add a machine deployment click ADD MACHINE DEPLOYMENT in the machine deployments tab in the cluster details page.
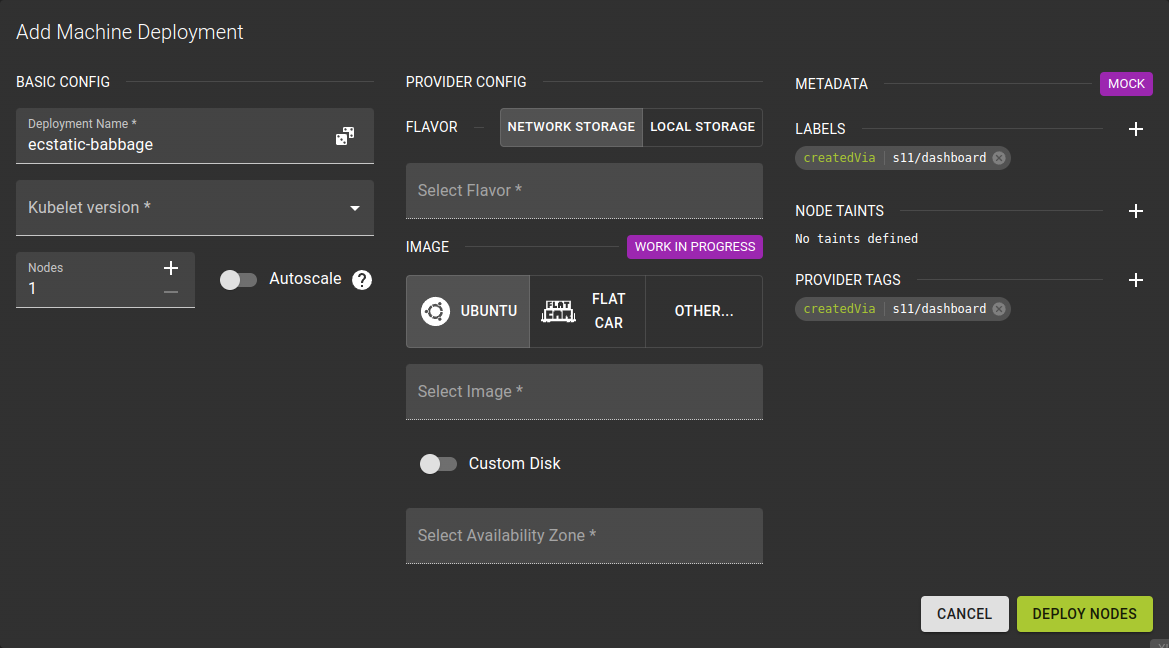
Adding a deployment is performed in the same way as defining the initial deployment during cluster creation.
Basic Configuration
- Name your deployment. The UI will suggest a name for you but feel free to change it.
- Kubelet version
- Define the number of nodes in your deployment.
- You can specify an absolute number
- You can also configure the node pool to scale automatically between a minimum and maximum number
Provider Specific Configuration
Here you configure additional settings for openstack.
Flavor- Determines the size / specs of the server.
Image- Select which image should be used to provision the nodes.
Custom Disk- Allows you to override the default size of the volumes on each node
Availability Zone- Select the availability zone for the nodes
Metadata
Provide Metadata in the form of labels to facilitate addressing resources and automationRemove Machine Deployment
To delete a machine deployment click the at the top of a machine deployment
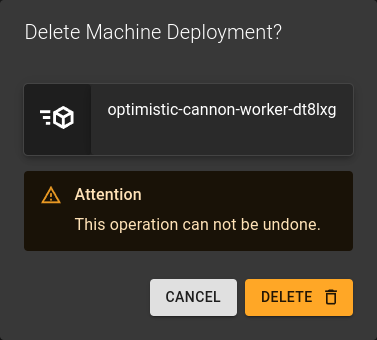 Confirm the operation by clicking DELETE in the prompt
Usage
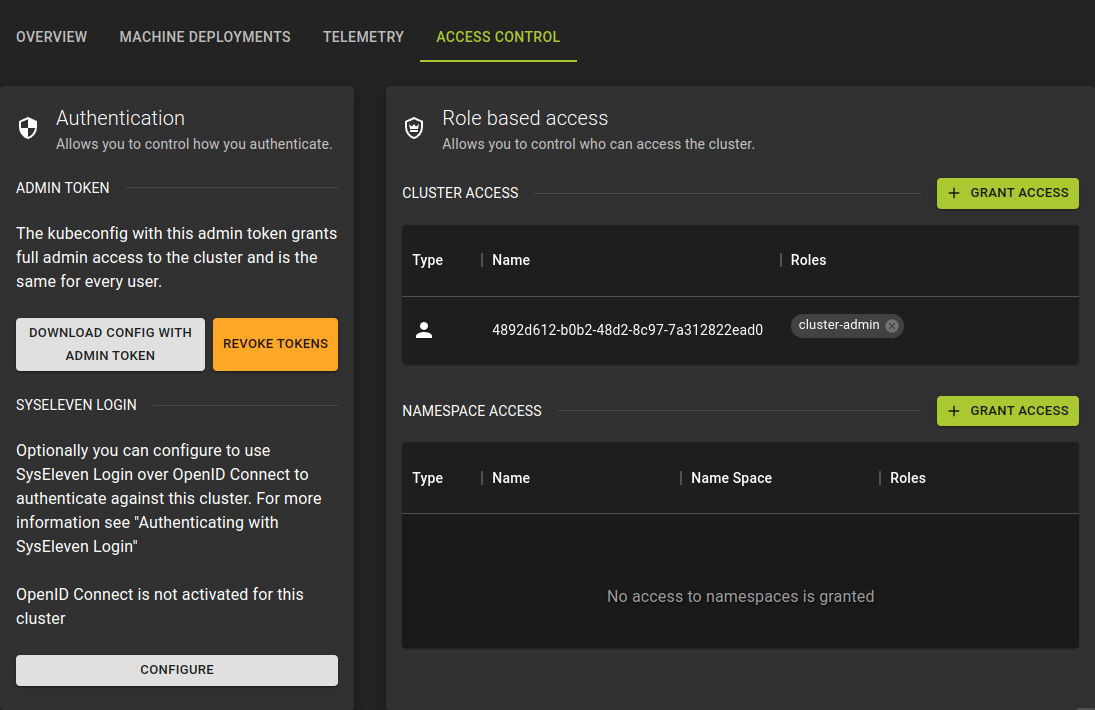
Manage Access Control
Access Control Overview
This section allows you to manage cluster access and authentication. You can:
- Download Config with Admin Token: Grants full admin access to the cluster.
- Revoke Tokens: Revokes existing admin tokens.
- Configure SysEleven Login: Optionally, configure SysEleven Login using OpenID Connect for cluster authentication.
- Grant Access: Manage user access to the cluster and namespaces.
Usage
Manage SSH Keys
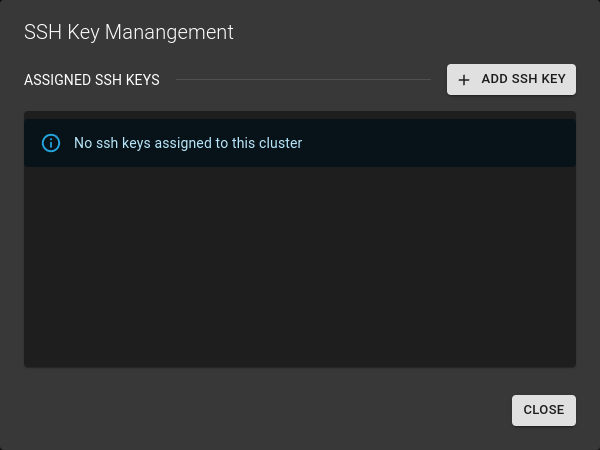 You can view and manage the SSH Keys of a cluster by clicking Manage SSH Keys in the details page of a cluster
From here you can remove, add and import keys.
Add Key
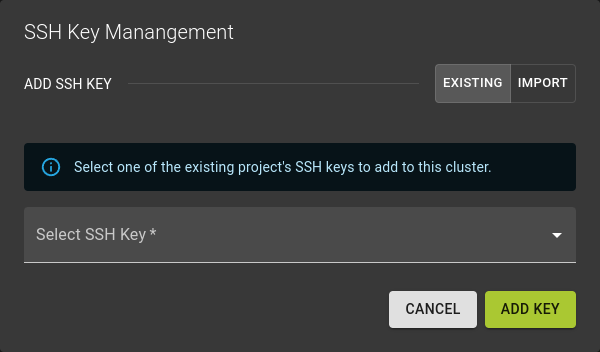
To add a key click Add SSH Key in the SSH Key manager described above.
You can then simply select the key to add from the dropdown.
Import
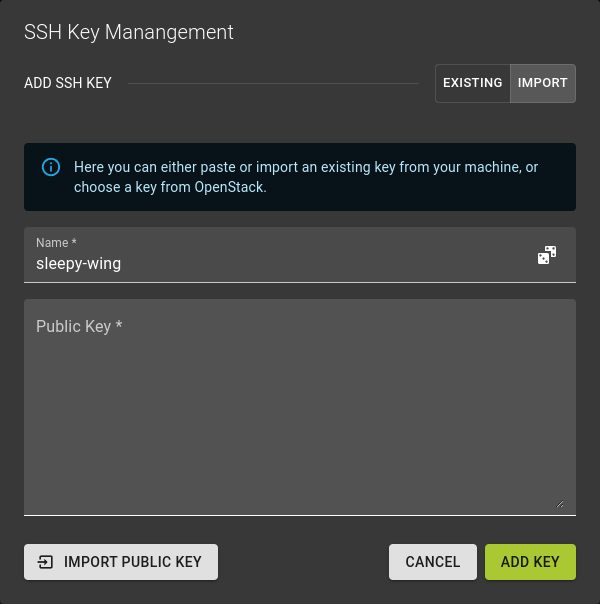 In case you want to add a completely new SSH Key select the
 IMPORT option in the SSH Key manager dialog
You now have the choice between:
- Importing a key using the Import Public Key option
- already registered in openstack
- importing a new key from file
- Simply pasting a new public key
Usage
Delete Cluster
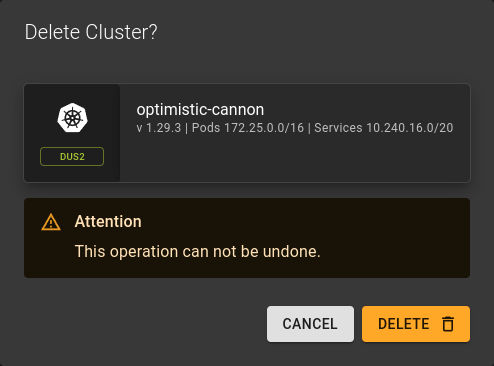
To delete a cluster you can
- Click the icon at the end of an entry in the cluster list.
- Click the DELETE CLUSTER button in the title bar of the cluster details page.
Confirm the deletion in the emerging dialog by clicking DELETE
Usage