SysEleven OpenStack Cloud - DNS 95%
Concepts
The SysEleven service delivers a comprehensive Domain Name Service as a Service (DNSaaS), offering an efficient solution for managing your cloud-based domain infrastructure. By leveraging our authoritative DNS infrastructure, you can easily oversee and configure your domains and associated records with ease.
DNSaaS, powered by the OpenStack Designate project, automates the configuration of domain name resolution, allowing for the efficient management of zones and records. This service is shared across all regions, ensuring consistent and centralized management throughout your cloud environment.
Here are the key components and their roles:
-
zone: Represents a domain or subdomain where records are maintained, defining the administrative boundary for a specific domain. -
record: Maps domain names to IP addresses or other resources, translating user-friendly names into machine-readable addresses. -
recordset: Groups multiple records under a common name, enabling organized and efficient management of related entries within a zone.
List Zones
 To view a list of all zones, click on the DNS icon in the sidebar.
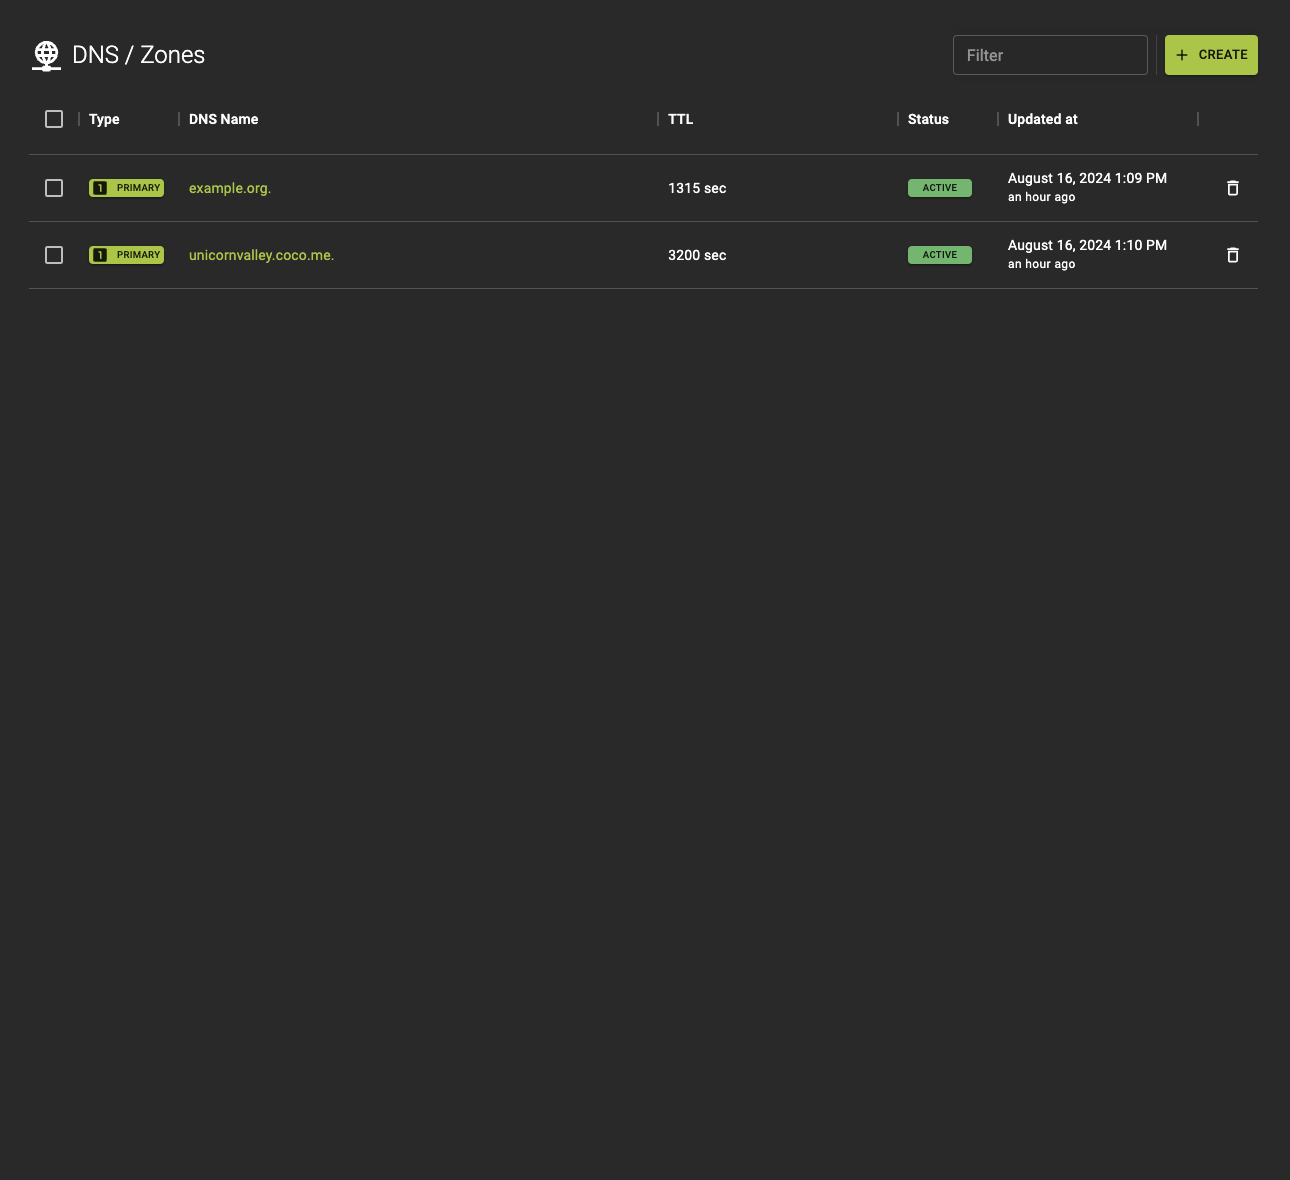 From the list you can:
- Create new zones.
- Navigate to the details of a zone by clicking the name.
Usage
openstack zone list
Output
+--------------------------------------+--------------+-----------+------------+---------+--------+
| id                                   | name         | type      | serial     | status  | action |
+--------------------------------------+--------------+-----------+------------+---------+--------+
| 8f5b3e2f-4e14-47c1-8e93-d2f9c4f5fa7e | example.com. | PRIMARY   | 2021081001 | ACTIVE  | NONE   |
| 4d2d4a7c-b8f5-42c1-bb22-dc4bfeb3ea1e | example.net. | PRIMARY   | 2021081002 | ACTIVE  | NONE   |
| d9c9e7fd-1db4-4ae8-8bc9-5769d5e7c3e2 | example.org. | SECONDARY | 2021081003 | PENDING | NONE   |
+--------------------------------------+--------------+-----------+------------+---------+--------+
Example
Create a Zone
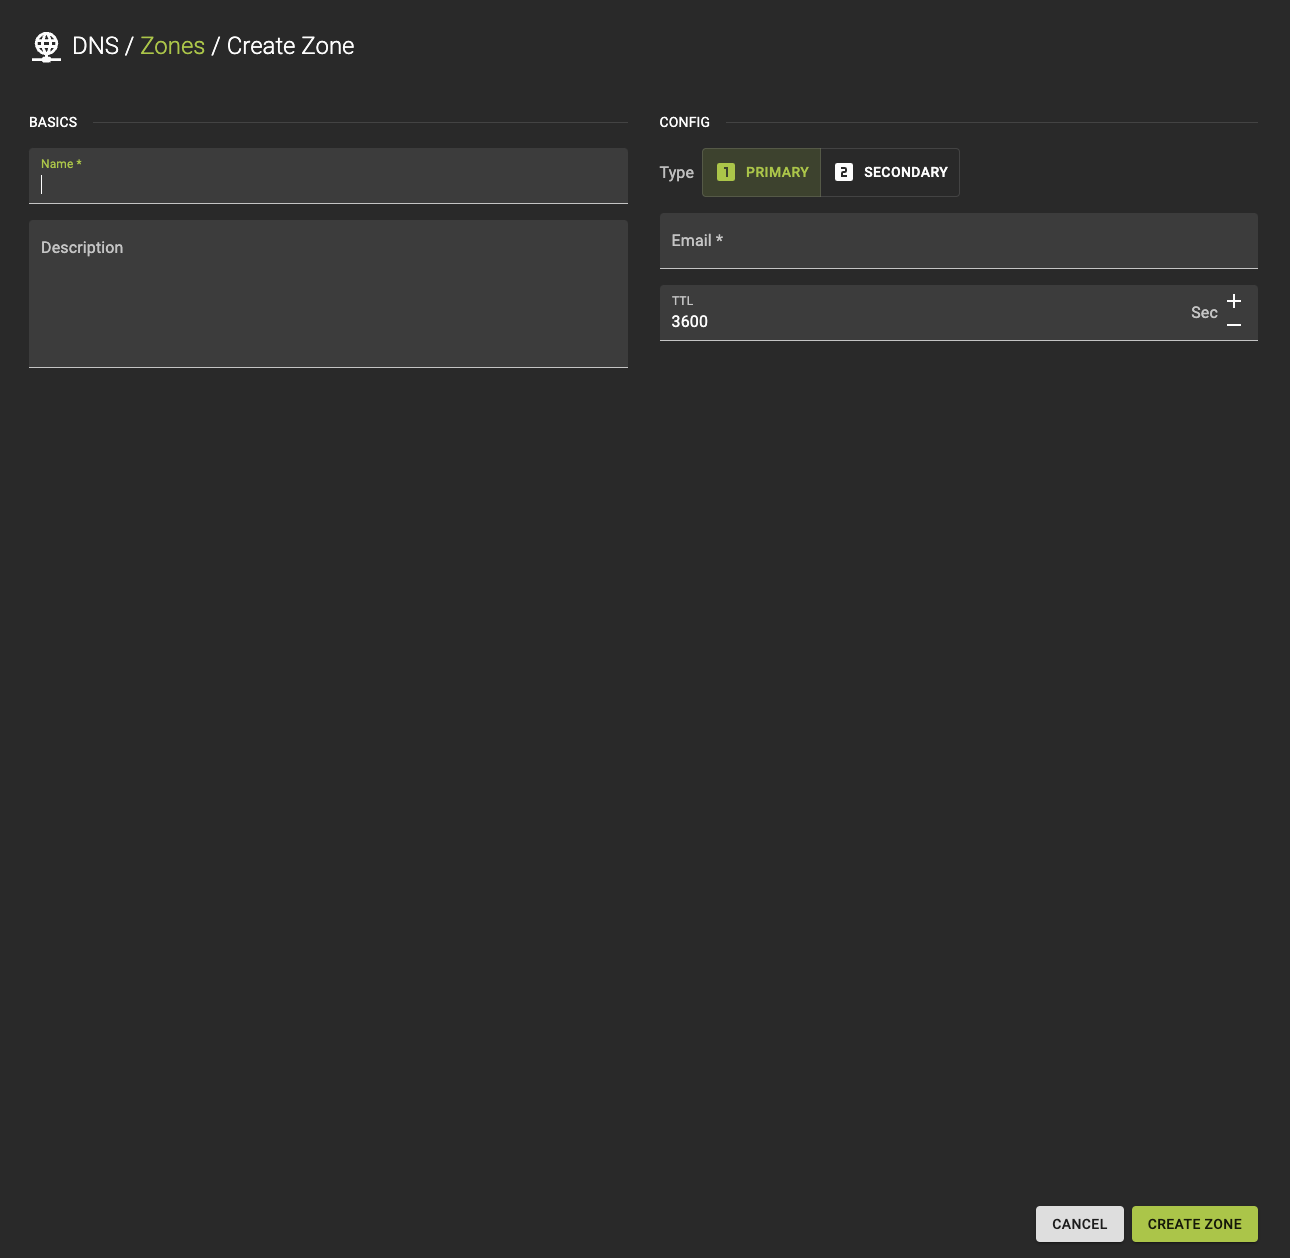
To create a zone navigate to the zone list and click the Create button in the titlebar.
Info
Please note that zones in the SysEleven service must be fully qualified, meaning they must end with a trailing dot. For example, if your domain name is example.com, the corresponding fully qualified zone name would be example.com.
To create a new zone, follow these steps and configure the required parameters:
-
Specify the fully qualified domain name (FQDN) for the zone.
-
Provide a brief description of the zone to help identify its purpose or any other relevant details.
-
Choose the zone type:
primary: Select this if you want the records to be managed directly in this zone. The primary server will be authoritative for the zone.secondary: Choose this if the zone should receive its records from a primary zone through zone transfers. This type ensures redundancy and backup.
-
Enter the email address of the administrator responsible for the zone. This is used for administrative contact purposes.
-
Set the TTL (Time to Live) value, which determines how long records are cached by resolvers. The TTL is defined in seconds.
Info
When you create a new zone in OpenStack, the system automatically generates two essential records: SOA (Start of Authority) and NS (Name Server).
-
The
SOArecord provides important information about the zone, including the primary name server, the email of the domain administrator, and settings for zone transfers. It essentially defines the authority for the domain. -
The
NSrecord specifies the name servers that manage the records within the zone, ensuring that queries for the domain are directed to the correct servers for resolution.
These records are fundamental for the proper operation and delegation of the zone.
Usage
openstack zone create
    [--email EMAIL]
    [--type {PRIMARY,SECONDARY}]
    [--ttl TTL]
    [--description DESCRIPTION]
    [--masters MASTERS [MASTERS ...]]
    [--attributes ATTRIBUTES [ATTRIBUTES ...]]
    [--all-projects]
    [--sudo-project-id SUDO_PROJECT_ID]
    name
--email <EMAIL>- Zone Email
--type <TYPE>- Zone Type
--ttl <TTL>- Time To Live (Seconds)
--description <DESCRIPTION>- Description
--masters <MASTERS>- Zone Masters
--attributes <ATTRIBUTES>- Zone Attributes
--all-projects- Show results from all projects. Default: False
--sudo-project-id <SUDO_PROJECT_ID>- Project ID to impersonate for this command. Default: None
name- Zone Name
Example:
# Terraform Provider configuration

terraform {
  required_providers {
    openstack = {
      source  = "terraform-provider-openstack/openstack"
    }
  }
}

# DNS zone configuration

resource "openstack_dns_zone_v2" "example_com" {
  name        = "example.com."
  email       = "dns@example.com"
  description = "example zone"
  ttl         = 3600
  type        = "PRIMARY"
}
Inspect and Modify a Zone
To view or modify a zone’s details and manage its records, click on the zone name in the list to access the detailed page.
Here’s what you can do on the details page.
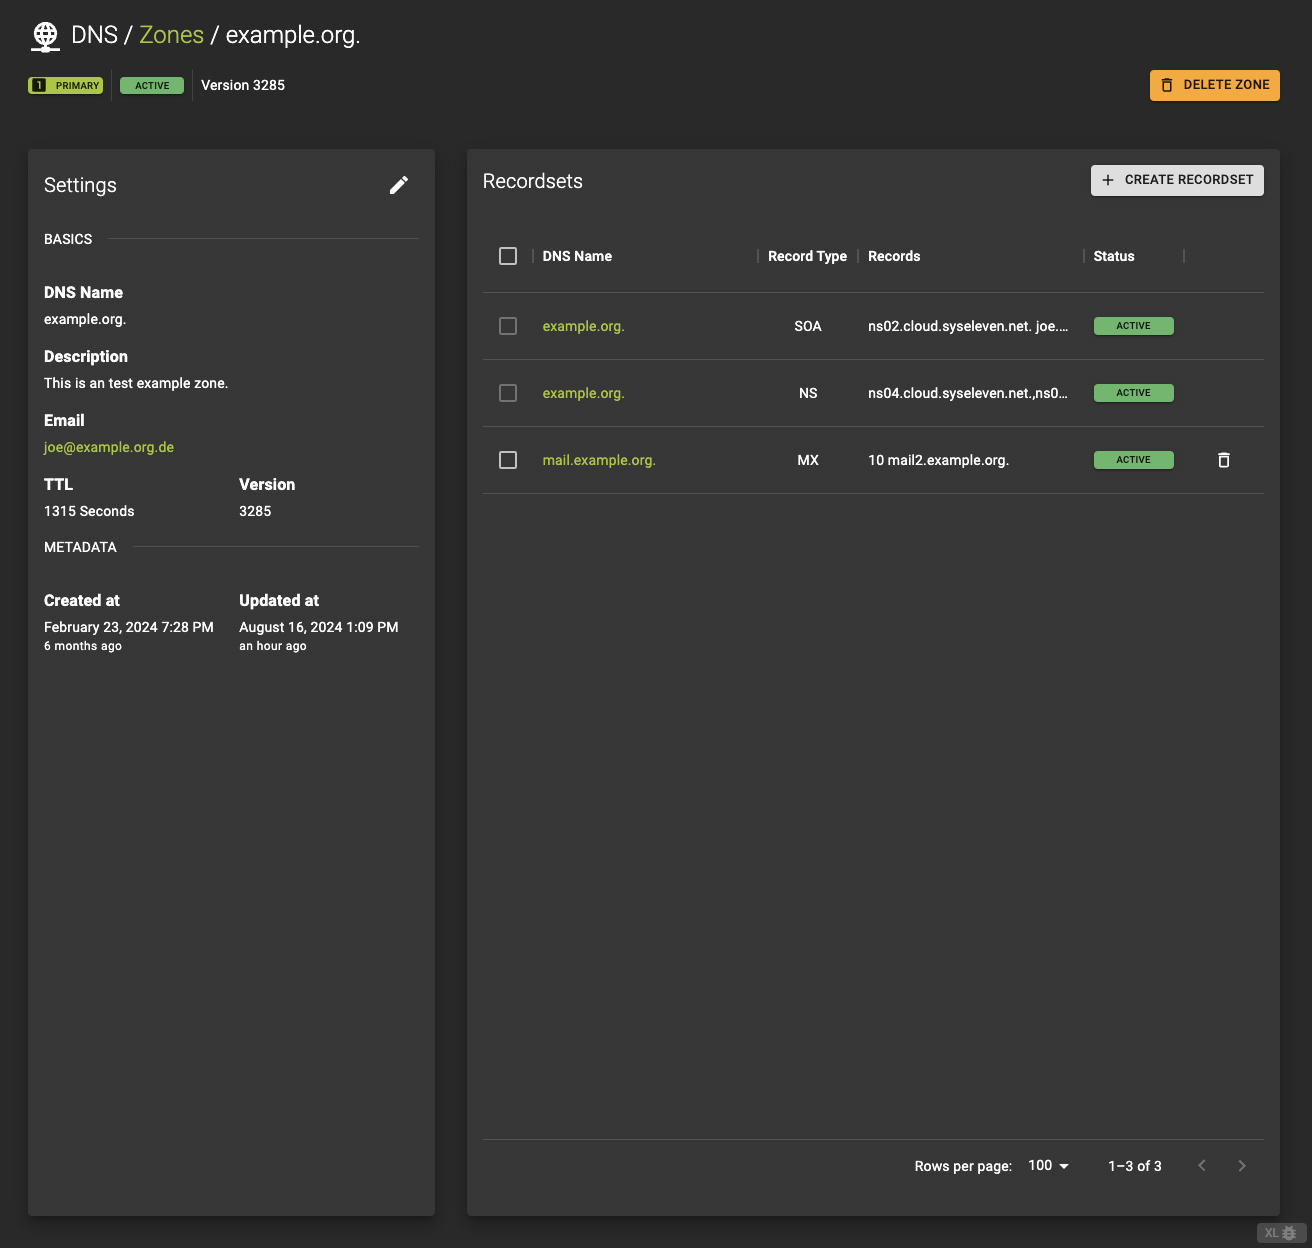
Review the current settings and status
- View details about the zone, including its name, type, and status.
- See an overview of the
recordsets, showing how records are grouped within the zone.
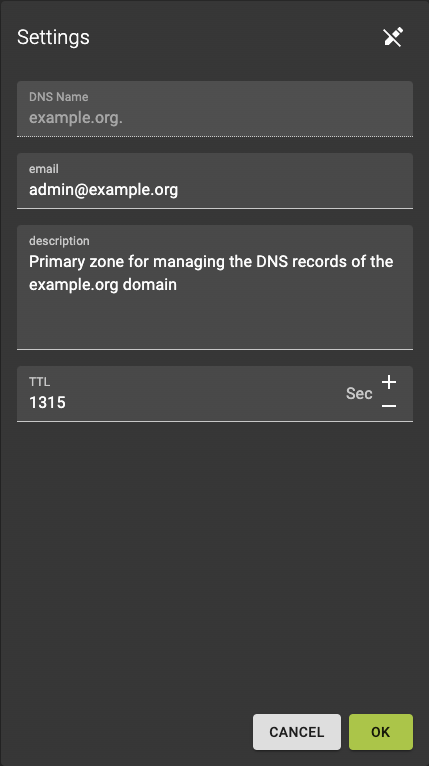
Set the properties
To modify the zone settings, click the button. You can then:- Update the email address associated with the zone.
- Change the description to better reflect the zone's purpose or usage.
- Adjust the
TTL(Time To Live) value to control how long DNS resolvers cache the zone's information.
Usage
openstack zone set
    [--email EMAIL]
    [--ttl TTL]
    [--description DESCRIPTION | --no-description]
    [--masters MASTERS [MASTERS ...]]
    [--all-projects]
    [--sudo-project-id SUDO_PROJECT_ID]
    id
--email <EMAIL>- Zone Email
--ttl <TTL>- Time To Live (Seconds)
--description <DESCRIPTION>- Description
--no-description--masters <MASTERS>- Zone Masters
--all-projects- Show results from all projects. Default: False
--sudo-project-id <SUDO_PROJECT_ID>- Project ID to impersonate for this command. Default: None
id- Zone ID
Example
List Recordsets
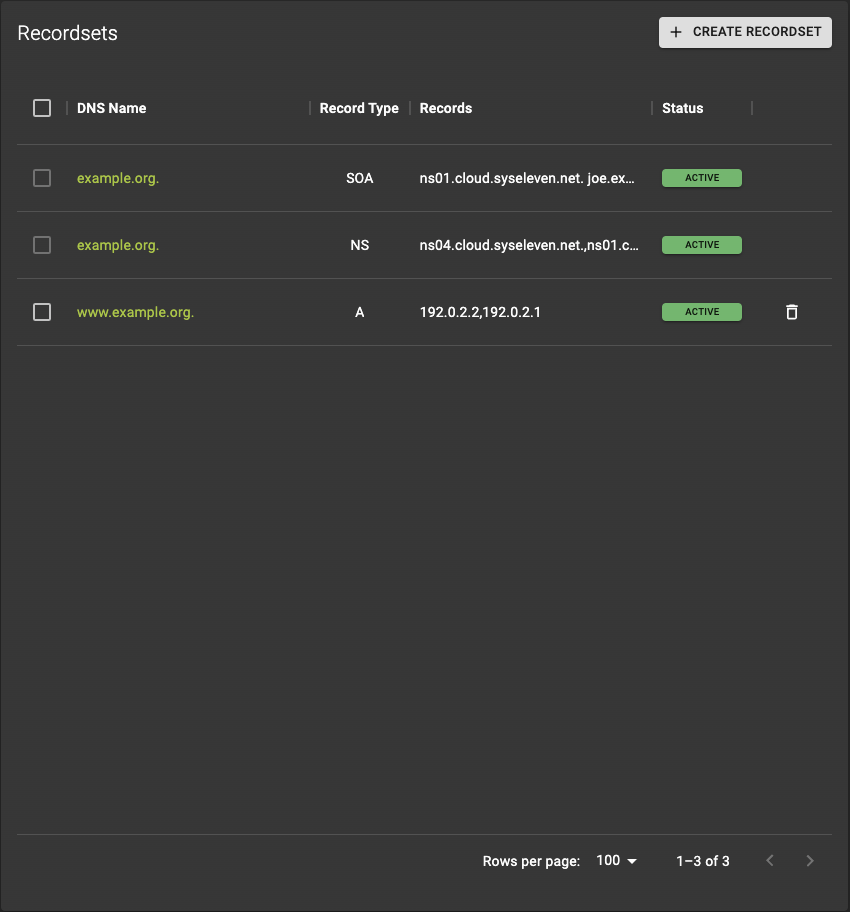 In the zone records section, you can:
- See all existing records associated with the zone.
- Add new records by clicking Create Recordsets button.
- Click on a record name to view or modify its details.
Usage
openstack recordset list <zone_id>
Output
+--------------------------------------+-------------------+------+--------------------------+---------+--------+
| id                                   | name              | type | records                  | status  | action |
+--------------------------------------+-------------------+------+--------------------------+---------+--------+
| 123e4567-e89b-12d3-a456-426614174000 | example.org.      | SOA  | ns1.example.org. admin.  | ACTIVE  | None   |
| 123e4567-e89b-12d3-a456-426614174001 | www.example.org   | A    | 192.0.2.1                | ACTIVE  | None   |
| 123e4567-e89b-12d3-a456-426614174002 | mail.example.org. | MX   | 10 mail.example.org.     | ACTIVE  | None   |
| 123e4567-e89b-12d3-a456-426614174003 | example.org.      | NS   | ns1.example.org.         | ACTIVE  | None   |
+--------------------------------------+-------------------+------+--------------------------+---------+--------+
Example
Create Recordsets
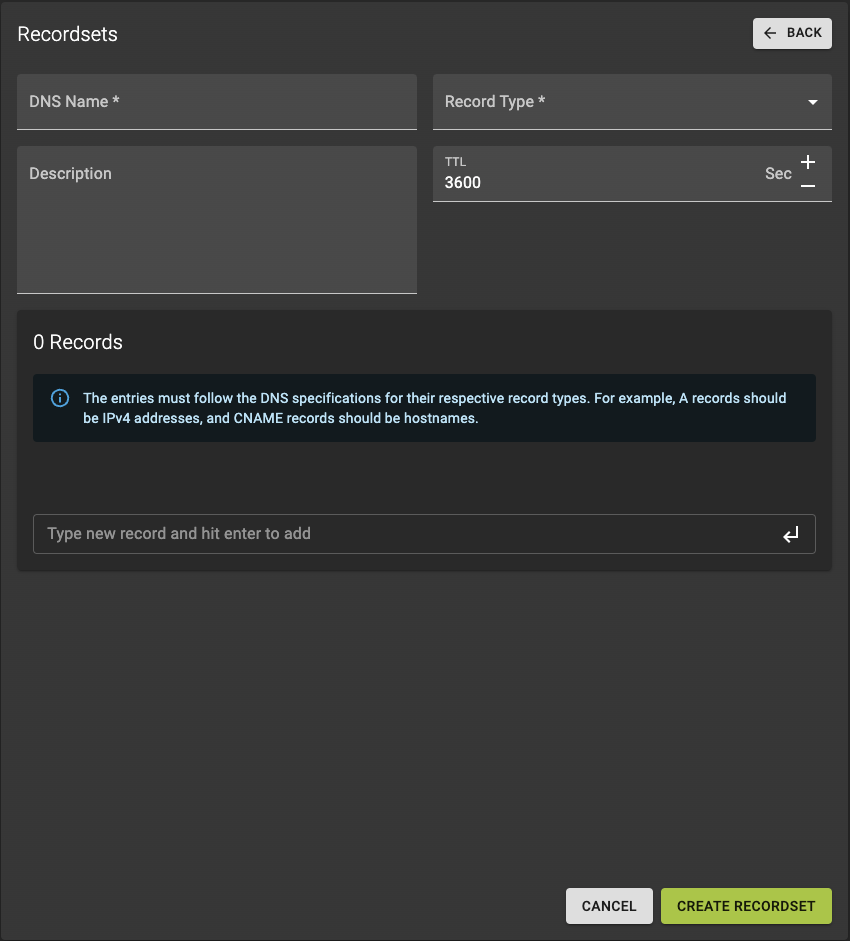
To create a new zone record, follow these steps:
-
Specify the name for the new record, which typically represents a subdomain or hostname within the zone.
-
Choose the type of record (e.g., A, CNAME, MX) to define how the record should be used for domain resolution.
-
Define the TTL (Time to Live) value, which determines how long the record is cached by resolvers before being refreshed.
-
Optionally, add a description to help identify or explain the purpose of the record.
Finalize
After filling out all the required fields, review your settings and click Create Recordsets to complete the process and add the new record to the zone.Info
Please note that the creation of a new record may take some time to process and propagate across the system.
Usage
openstack recordset create
    --record RECORD
    --type TYPE
    [--ttl TTL]
    [--description DESCRIPTION]
    [--all-projects]
    [--sudo-project-id SUDO_PROJECT_ID]
    zone_id
    name
--record <RECORD>- RecordSet Record, repeat if necessary
--type <TYPE>- RecordSet Type
--ttl <TTL>- Time To Live (Seconds)
--description <DESCRIPTION>- Description
--all-projects- Show results from all projects. Default: False
--sudo-project-id <SUDO_PROJECT_ID>- Project ID to impersonate for this command. Default: None
zone_id- Zone ID
name- RecordSet Name
Example:
# Terraform Provider configuration

terraform {
  required_providers {
    openstack = {
      source  = "terraform-provider-openstack/openstack"
    }
  }
}

# DNS zone configuration

resource "openstack_dns_zone_v2" "example_com" {
  name        = "example.com."
  email       = "dns@example.com"
  description = "example zone"
  ttl         = 3600
  type        = "PRIMARY"
}

# DNS recordset configuration

resource "openstack_dns_recordset_v2" "dns_example_com" {
  zone_id     = openstack_dns_zone_v2.example_com.id
  name        = "dns.example.com."
  description = "An example record set"
  ttl         = 3000
  type        = "A"
  records     = ["10.62.62.1"]
}
Inspect and Modify a Recordsets
 In the recordset details page, you can:
- Modify the description.
- Adjust the TTL value.
- Add new records.
- Remove existing records by clicking on the next to it.
After making your changes, review the updated settings and click Update Recordset to apply the modifications.
Show Recordset Details
Usage
openstack recordset show
    [--all-projects]
    [--sudo-project-id SUDO_PROJECT_ID]
    zone_id
    id
--all-projects- Show results from all projects. Default: False
--sudo-project-id <SUDO_PROJECT_ID>- Project ID to impersonate for this command. Default: None
zone_id- Zone ID
id- RecordSet ID
Update Recordset
Usage
openstack recordset set
    [--record RECORD]
    [--description DESCRIPTION | --no-description]
    [--ttl TTL | --no-ttl]
    [--all-projects]
    [--sudo-project-id SUDO_PROJECT_ID]
    [--edit-managed]
    zone_id
    id
--record <RECORD>- RecordSet Record, repeat if necessary
--description <DESCRIPTION>- Description
--no-description--ttl <TTL>- TTL
--no-ttl--all-projects- Show results from all projects. Default: False
--sudo-project-id <SUDO_PROJECT_ID>- Project ID to impersonate for this command. Default: None
--edit-managed- Edit resources marked as managed. Default: False
zone_id- Zone ID
id- RecordSet ID
Example
Delete Recordsets
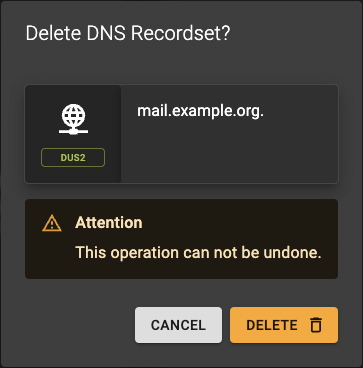 To remove a recordset, click the icon next to the recordset you want to delete.
Confirm the deletion in the dialog by clicking the Delete button.
Usage
openstack recordset delete
    [--all-projects]
    [--sudo-project-id SUDO_PROJECT_ID]
    [--edit-managed]
    zone_id
    id
--all-projects- Show results from all projects. Default: False
--sudo-project-id <SUDO_PROJECT_ID>- Project ID to impersonate for this command. Default: None
--edit-managed- Edit resources marked as managed. Default: False
zone_id- Zone ID
id- RecordSet ID
Example
Delete Zone
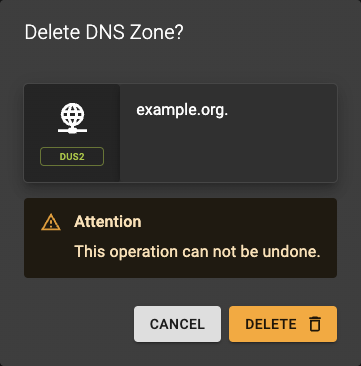 You can delete a zone
- From the list of zones by using the action button
- From the details page of a zone by clicking the delete zone button from the titlebar
Confirm the operation in the dialog by clicking delete
Usage
openstack zone delete
    [--delete-shares]
    [--all-projects]
    [--sudo-project-id SUDO_PROJECT_ID]
    [--hard-delete]
    id
--delete-shares- Delete existing zone shares. Default: False
--all-projects- Show results from all projects. Default: False
--sudo-project-id <SUDO_PROJECT_ID>- Project ID to impersonate for this command. Default: None
--hard-delete- Delete zone along-with backend zone resources (i.e. files). Default: False
<id>- Zone ID
Example