SysEleven OpenStack Cloud - Images
Listing Images
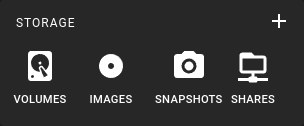 To get a list of all images in a region you can click on the Images icon in the sidebar.
The list also allows you to quickly launch a server or create a volume from an image by using option.
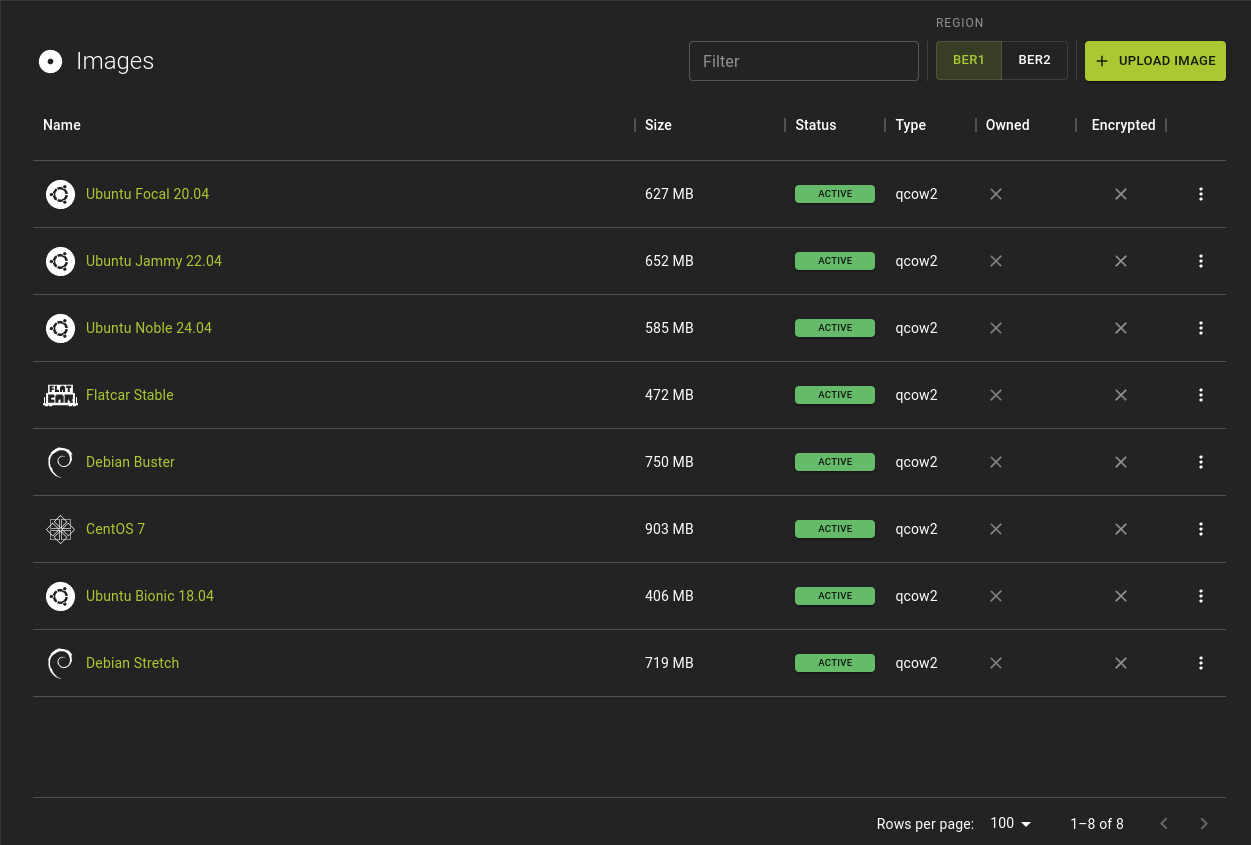
Example
Creating an Image
Images can be created in two ways
- By uploading an image file
- By converting a volume snapshot to an image
Uploading an Image
Info
There is currently no support for uploading images using the UI. Please refer to the CLI description for this task.
Usage
openstack image create  [--container-format <container-format>]
                        [--disk-format <disk-format>]
                        [--min-disk <disk-gb>] [--min-ram <ram-mb>]
                        [--file <file>] [--volume <volume>] [--force]
                        [--protected | --unprotected]
                        [--public | --private] [--property <key=value>]
                        [--tag <tag>] [--project <project>]
                        [--project-domain <project-domain>]
                        <image-name>
<container-format>- Image container format
- default: bare
<disk-format>- Image disk format
- default: raw
<disk-gb>- Minimum disk size needed to boot image, in GB
<ram-mb>- Minimum RAM size needed to boot image, in MB
<file>- Path of local image file to be uploaded
--protected | --unprotected- Protects / Unprotects image from deletion
--public | --private- Controls whether image will be visible to the public or not
<key=value>- Sets a property on the image
- Can be repeated
<tag>- Sets a tag on the image
- Can be repeated
<image-name>- Identifier (name only) of image to be uploaded
Example:
# Terraform Provider configuration

terraform {
  required_providers {
    openstack = {
      source  = "terraform-provider-openstack/openstack"
    }
  }
}

# Image configuration

resource "openstack_images_image_v2" "ubuntu-orcular" {
  name             = "Ubuntu Oracular Oriole 24.10"
  image_source_url = "https://cloud-images.ubuntu.com/oracular/current/oracular-server-cloudimg-amd64.img"
  container_format = "bare"
  disk_format      = "qcow2"
}
Boot from this image using UEFI firmware
If you want to use UEFI firmware to boot your image, instead of the default BIOS firmware, you need to set two properties on the image:
hw_firmware_type=uefihw_machine_type=q35
You can set these either while creating the image or later. The image will now always boot in UEFI mode.
Info
There is currently no support for uploading images using the UI. Please refer to the CLI description for this task.
Options to add when creating the image:
openstack image create --property hw_firmware_type=uefi
                       --property hw_machine_type=q35
                       ... your other arguments ...
Command to add the properties to an existing image:
openstack image set --property hw_firmware_type=uefi
                    --property hw_machine_type=q35
                <image-id>
Example:
# Terraform Provider configuration

terraform {
  required_providers {
    openstack = {
      source  = "terraform-provider-openstack/openstack"
    }
  }
}

# Image configuration

resource "openstack_images_image_v2" "ubuntu-orcular" {
  name             = "Ubuntu Oracular Oriole 24.10"
  image_source_url = "https://cloud-images.ubuntu.com/oracular/current/oracular-server-cloudimg-amd64.img"
  container_format = "bare"
  disk_format      = "qcow2"

  properties = {
    hw_firmware_type = "uefi"
    hw_machine_type  = "q35"
  }
}
Converting a Volume
Info
Note that the source volume has to be in status AVAILABLE and not IN USE.
If this is not the case you can still force the operation in which case the operation can fail or the resulting image may be corrupted.
 To convert a volume to an image you can
- Use the menu in the volumes list and select the
Upload to imageoption - Use the Upload as image option on a volumes detail page
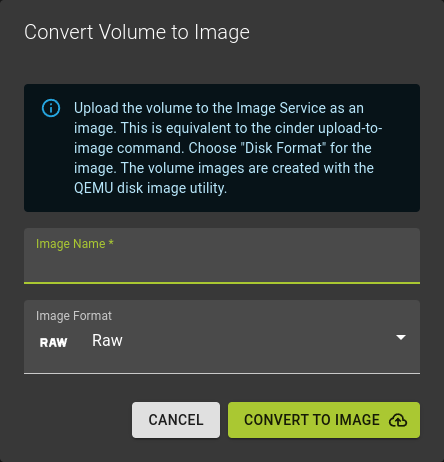
In the emerging dialog
- Name the image
- Select the format of the image
- Click Convert to Image
This operation will entail a series of status changes on the source volume.
Once the conversion is complete you may want to modify the resulting image further. E.g. if you need additional metadata or want to modify any properties.
Usage
openstack image create --volume <volume> [--force]
                        [--protected | --unprotected]
                        [--public | --private]
                        [--property <key=value>]
                        [--tag <tag>]
                        <image-name>
<volume>- Volume to be used for conversion
--force- Performs the conversion regardless of the state of the source volume
--protected | --unprotected- Protects / Unprotects image from deletion
--public | --private- Controls whether image will be visible to the public or not
<key=value>- Sets a property on the image
- Can be repeated
<tag>- Sets a tag on the image
- Can be repeated
<image-name>- Identifier (name only) of image to be uploaded
Example
View and modify an Image
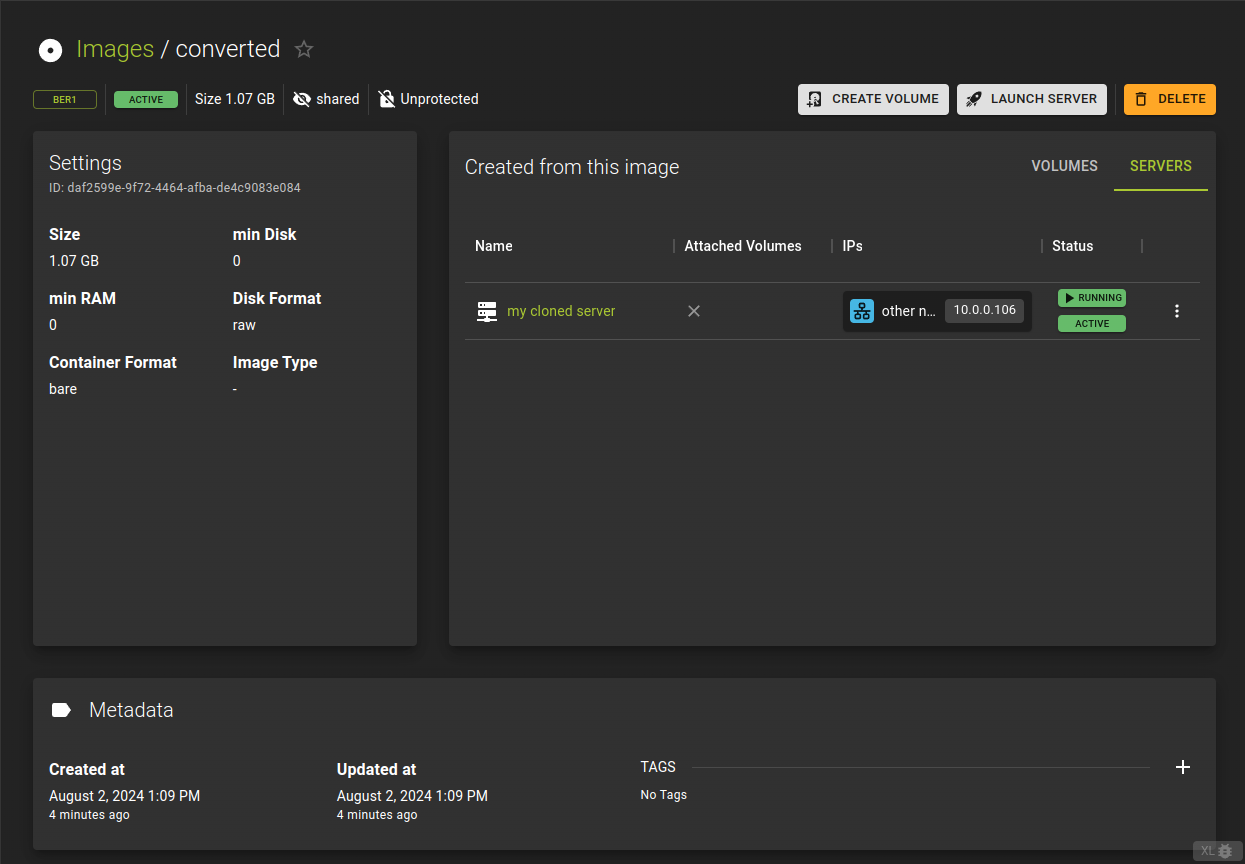
- Clicking the name of an image on the image list.
- Following a link to the image from where it is in use. E.g. on a servers storage details.
The image details show you all properties of an image and provide you with lists of
Show image details
Usage
openstack image show <image>
<image>- Identifier of image to show
Update image
Usage
openstack image set
    [--name <name>]
    [--min-disk <disk-gb>]
    [--min-ram <ram-mb>]
    [--container-format <container-format>]
    [--disk-format <disk-format>]
    [--protected | --unprotected]
    [--public | --private | --community | --shared]
    [--property <key=value>]
    [--tag <tag>]
    [--architecture <architecture>]
    [--instance-id <instance-id>]
    [--kernel-id <kernel-id>]
    [--os-distro <os-distro>]
    [--os-version <os-version>]
    [--ramdisk-id <ramdisk-id>]
    [--deactivate | --activate]
    [--hidden | --unhidden]
    <image>
--name <name>- New image name
--min-disk <disk-gb>- Minimum disk size needed to boot image, in gigabytes
--min-ram <ram-mb>- Minimum RAM size needed to boot image, in megabytes
--container-format <container-format>- Image container format. The supported options are: ami, ari, aki, bare, docker, ova, ovf
--disk-format <disk-format>- Image disk format. The supported options are: ami, ari, aki, vhd, vmdk, raw, qcow2, vhdx, vdi, iso, ploop
--protected- Prevent image from being deleted
--unprotected- Allow image to be deleted (default)
--public- Image is accessible and visible to all users
--private- Image is only accessible by the owner (default until –os-image-api-version 2.5)
--community- Image is accessible by all users but does not appear in the default image list of any user except the owner (requires –os-image-api-version 2.5 or later)
--shared- Image is only accessible by the owner and image members (requires –os-image-api-version 2.5 or later) (default since –os-image-api-version 2.5)
--property <key=value>- Set a property on this image (repeat option to set multiple properties)
--tag <tag>- Set a tag on this image (repeat option to set multiple tags)
--architecture <architecture>- Operating system architecture
--instance-id <instance-id>- ID of server instance used to create this image
--kernel-id <kernel-id>- ID of kernel image used to boot this disk image
--os-distro <os-distro>- Operating system distribution name
--os-version <os-version>- Operating system distribution version
--ramdisk-id <ramdisk-id>- ID of ramdisk image used to boot this disk image
--deactivate- Deactivate the image
--activate- Activate the image
--accept- Accept the image membership for either the project indicated by ‘–project’, if provided, or the current user’s project
--reject- Reject the image membership for either the project indicated by ‘–project’, if provided, or the current user’s project
--pending- Reset the image membership to ‘pending’
--hidden- Hide the image
--unhidden- Unhide the image
<image>- Image to modify (name or ID)
Example
Deleting an Image
Restrictions apply
- You can only delete images that you own. The images provided by SysEleven can not be deleted.
- An image has to be in the state
AVAILABLEin order to be deletable.
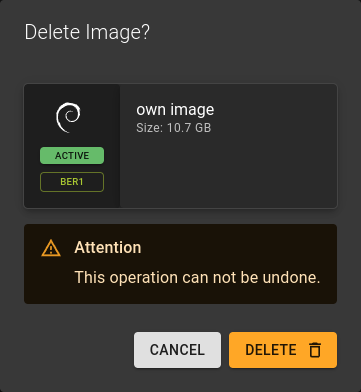
Images can be deleted
- From the list of images using the option at the end of each entry
- From images detail page sing the Delete button in the titlebar
The option to delete will only be displayed for images that you own and are in a valid state.
Example